27 March 2012

Fried smelt

While strolling through my local Whole Foods, gazing at the various different sea critters available for dinner, I heard an older man very animatedly extolling the virtues of smelt. "Oh, I grew up in Seattle. We'd serve them for breakfast. Just put a batter on them, deep fry them and eat them. They weren't cleaned like they are here, we'd eat the whole thing. I love them."

After a brief discussion with him, I bought a pound of smelt.

Smelt

The older man in the store emphasized simplicity when cooking smelt, so I kept it simple, using an adaptation of what I found at Steamy Kitchen.
¾ cup corn meal
¼ cup flour
2 teaspoons garlic powder
1 teaspoon salt
1 pound smelt
2 tablespoons butter
handful fresh thyme, minced
2 cloves garlic
1 whole chili, minced
salt and pepper
juice from 1 lemon
olive oil
Mix the corn meal, flour and garlic powder.

Breading

Dredge the smelt through the breading, and gently set aside.

Breaded smelt

Meanwhile, melt the butter and heat the garlic in the butter. Toss in the thyme, salt and lemon juice, and reserve warm.

Heat ¾" of olive oil until hot enough to fry. (You want it around 350°F). Set the smelt into the hot oil gently (so as not to splash - remember, the trick with hot oil is to get your fingers as close as possible to it so you're not dropping stuff in - you're actually less likely to burn yourself this way).

Frying smelt

Fry the smelt 2 minutes on a side, and remove from the hot oil. Drain briefly on a paper towel, then plate them. Drizzle the lemon/butter sauce over top of the smelt, and season with salt and pepper.

Serve immediately.

Fried smelt

So, I loved these. They're crisp and salty and hot and delicious. Bbq Jr. also couldn't get enough of these. Mrs. Dude was a little off put by the texture of eating a whole fish with bones. I think the next time we have this, Mrs. Dude will be on a trip...


By

22 March 2012

Eggs Benedict

Eggs

A perfectly poached egg is a beautiful thing. And when that egg is a fresh, home-raised egg, with thick shells, and sturdy yolks, it begs to be made into the perfect poached egg dish. Eggs Benedict.

Back bacon

Eggs Benedict is only difficult in timing the poached egg, the sauce and the back bacon to be all ready at the same time. But if you have three hands, or an assistant, it's a beautiful thing to start a spring morning with:
6 eggs
Hollandaise sauce
capers
back bacon (Canadian bacon)
3 English muffins
white wine vinegar
sea salt and pepper to season
Do the following things simultaneously:
1) Make the Hollandaise sauce.

2) Fry the back bacon in a pan over medium heat, flipping when a nice brown develops.

Back bacon

3) Bring a 3 inches of water in a pot to a boil. Add 1 tbsp white wine vinegar. Crack an egg into a coffee mug, and gently lower that egg into the boiling water. Repeat with the other eggs. Retrieve the eggs the moment the whites turn completely white. (2-3 minutes). Any longer, and you won't get beautiful, soft yolks.

4) Halve and toast the English muffins.

Ok. So now they're all ready at the same time. Place the bacon on top of the English muffin. Place the poached egg on top of the bacon. Season with salt and pepper. Drizzle on the Hollandaise sauce. And top with a few capers. No problem.

Eggs benedict

Serve. Delicious, perfect breakfast.

By

20 March 2012

Hollandaise sauce

Eggs

Mrs. Dude has a new gig and a new boss. Turns out he's a bit of a foodie, with home-raised chickens and bees. Our first big win? Fresh eggs. The shells are a lovely light green, and the yolks are sturdy. Separating them, I couldn't have easily broken them.

Egg yolks

What to do with these lovely things? We started with a hollandaise sauce. I used the recipe from The New Making of a Cook, with only a few small modifications.
⅓ cup plus 2 tbsp water
3 tbsp fresh-squeezed lemon juice
½ tsp salt
white pepper
3 large egg yolks
½ lb unsalted butter, melted
Mix the lemon juice and ⅓ cup of water, salt and pepper. Heat over high and reduce to 2 tbsp. Remove from heat and let cool.

Whisk in egg yolks, then put over medium heat. Whisk over medium heat until it makes a nice foamy mess. Continue whisking, and slowly add in the melted butter. The trick to making a beautiful emulsion is to add the butter slowly. You really can't go too slowly. Occasionally, you can add a few drops of water from your remaining 2 tbsp of water. But keep whisking, and keep adding the butter. Slowly.

Hollandaise

If you do it properly, you'll end with a nice, featureless yellow sauce. When everything is added, season to taste, and hold over low heat. Under no circumstances should you accidentally turn up the heat because you wanted to heat a different element. Really, don't crank it up, you might break the sauce and have to start over. And that would be sad. I'm just sayin.

Eggs benedict

Serve over eggs, or asparagus, or any delicious place. Yum.


By

17 March 2012

A lazy Saturday calls for...

... a Master Cleanse. While this will not end up being a lazy Saturday (I've been working my butt off all week, and will be in the lab all day today), still, an evening cocktail provides a chance to slow down, if only for a few minutes. This cocktail comes from the newest cookbook in my collection, The Art of Living According to Joe Beef. The cocktails in this book look magnificent (three of them feature meat products), but having just visited a sugar shack, I had to make the maple syrup cocktail, the Master Cleanse. I used a dark maple syrup from Thurston & Peters, natch.

Cocktail
½ cup maple syrup
½ cup fresh lemon juice
pinch of cayenne pepper
1 oz bourbon
sparkling water
While Joe Beef calls for heating the maple syrup and lemon juice, I did not. I merely mixed them well until the syrup no longer made ribbons in the lemon juice. Add the cayenne and bourbon. Mix well, and pour over ice. Top with sparkling water and serve. Joe Beef calls this one cocktail. In the Dude household, this made two very generous cocktails. This is one of the best bourbon sours I have ever had, and the ½ cup of maple doesn't come across as overly strong (indeed, you only get a hint of maple). But I might dial up the bourbon a tad next time.

I expect this cocktail to become a staple in our home. Going to have to sign up for bulk purchases of maple syrup.

By

15 March 2012

Sauerkraut

I'm a microbiologist. But I had made neither cheese nor sauerkraut in my home (until recently). No home microbiology (save wine and mead fermentations) have occurred in my home. During the day, I'm working my butt off to develop a rapid, sensitive, diagnostic test for Listeria contamination in food. Listeria is a deadly pathogen that can contaminate all kinds of food, but is most commonly associated with contaminated, unpasteurized dairy products. Given that I study food-poisoning, I'm rather more cautious in that area than most families.

It turns out, sauerkraut production is pretty toxic to to many food pathogens. Sauerkraut production is basically making an environment that makes Lactobacillus bacteria happy. If the salt concentration is high, and the environment is anaerobic, Lactobacillus will happily grow and piss out large amounts of lactic acid. Lactic acid is particularly toxic to non-lactic acid bacteria, translocating into the cell and dropping the pH of the cell in a way that many other acids don't. It's an excellent preservative. And it makes cabbage taste delicious. So win, win!

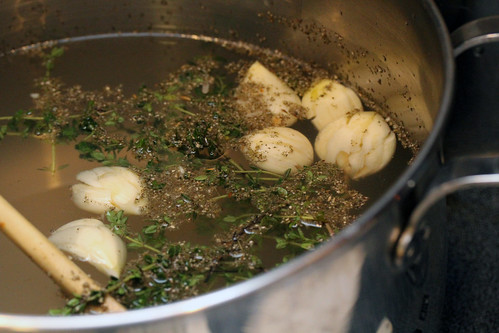
I used a sauerkraut recipe developed from a couple of online sources, and a brine developed from Charcuterie.

You'll need one piece of specialized equipment. An inert container (i.e., not plastic or metal). Either a glass (not a good idea, you might break it) or stoneware crock, and an inert item to cover it. I used a tight-fitting stoneware plate.

Cabbage
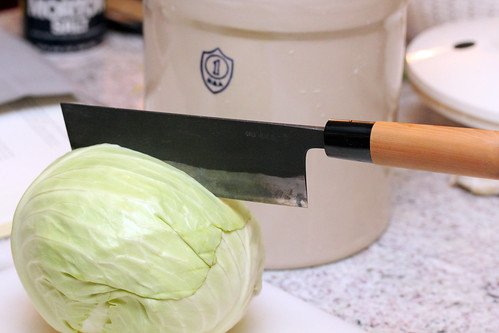
~ 2 lb cabbage (1 cabbage)
10 juniper berries
1 tsp caraway seeds
1 tsp yellow mustard seeds
1 tbsp sea salt
Chop the cabbage finely.

Shredded cabbage

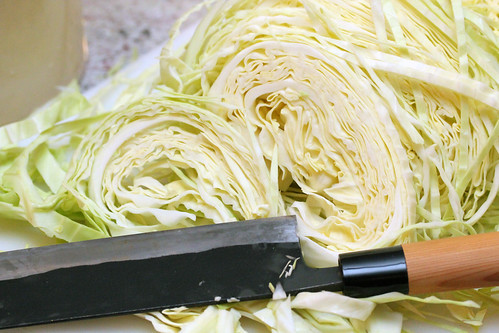
Mix with the salt, and pack it into the crockpot tightly.

Shredded cabbage

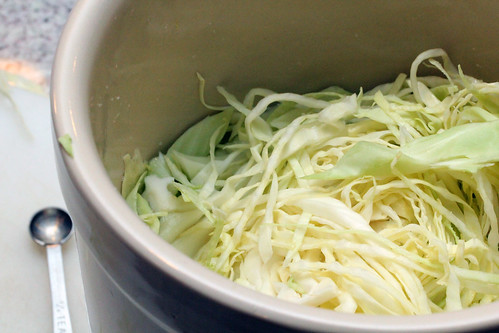
Sprinkle the herbs on top. Place your tight-fitting lid on top, and put something heavy on it. I used a 1 liter water bottle, and pushed down on it to squish the cabbage. This is important. The salt will draw out the water in the cabbage (pretty quickly, as it turns out - 4 hours after I mixed the cabbage and salt, water had filled up to the top). On top of the water bottle, I placed a tea towel, to keep out bugs and dust.

Every day, push down on the cabbage to squeeze out any air. Should it look like the water level is receding, top up with brine to keep all the cabbage submerged (to keep it anaerobic). Brine consists of:
1 cup water
1 tsp salt
Now you wait. Keep the sauerkraut cool, but not cold. The temperature in our house has ranged from 12°C to 20°C. At the end of the first day, there was a lot of water. By the end of day 5, that water was fizzing (that's carbon dioxide being produced as part of the fermentation of the sugars in the cabbage - the other byproduct of that is lactic acid). And at a week, the brine turned cloudy.

Fermenting

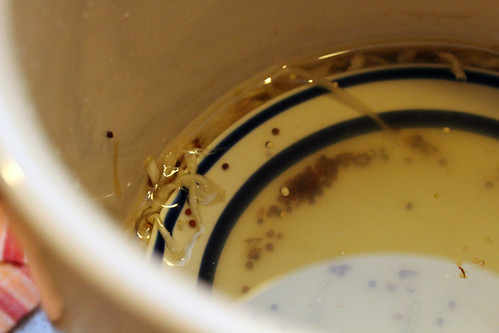
The cloudiness is the lactic acid bacteria themselves, present in high numbers.

By the end of two weeks, the fizzing had slowed, the cabbage had softened, and the cabbage had a faint smell to it. I've scooped out about ¼ of it.

Sauerkraut

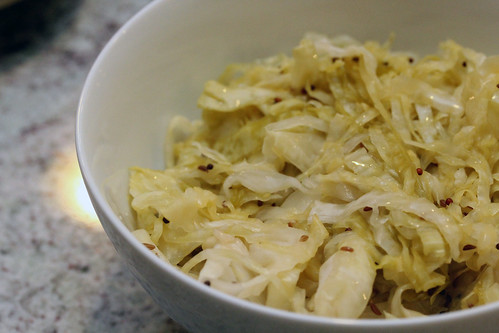
It has a more serious crunch to it than commercially sold sauerkraut, but the acid is definitely there. It's both subtler and more complex than a canned sauerkraut. And, in a big win, the first sauerkraut that Mrs. Dude actually enjoyed. She liked it!
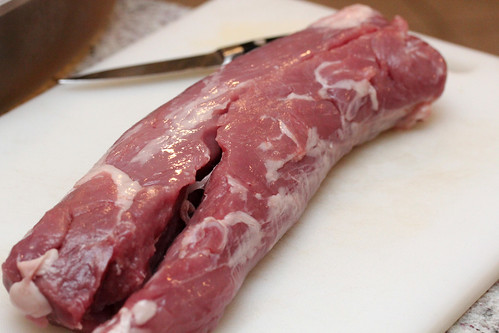
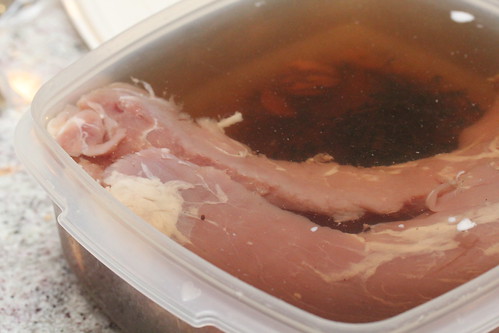
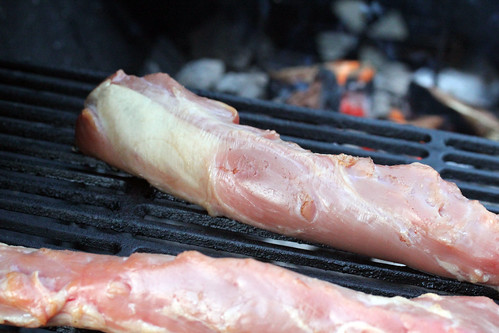
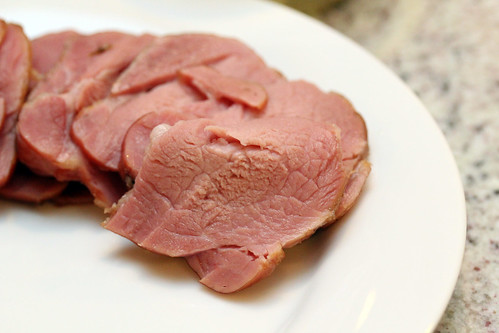
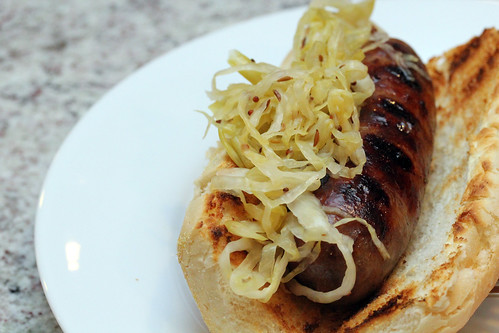
I served it with bratwurst on a bun. The acid and crunch go particularly well with the fat and smoke from the bratwurst. Delicious!

Bratwurst

This is a big win. You should make it at home. It's easy and requires little effort. Just patience, and a 30 seconds of diligence each day.

EDIT: Mar 19, 2012. Week 3, the kraut is more acidic and brighter than before. It continues to improve!

By

14 March 2012

Thurston & Peters Sugar House

Sugar shack

Growing up, my father would set a meal budget for us when we went to restaurants in the city. Our meal couldn't go over $5.00, which often meant that we would order water as a beverage, and no appetizer or dessert. My father was similarly frugal about other food items, and steak was rarely seen in our home. But there was one item that was never scrimped on. Maple syrup. Aunt Jemima and other cheap imitators were never seen in our home. We always had the real thing.

Maple syrup has a vastly superior and more complex flavor than other, simpler sugar syrups. Indeed, even as a child, I knew that the imposter syrups couldn't compete on flavor. And Aunt Jemima knew it, too. In the 1980s, she would advertise her syrups had superior pouring properties to mere maple syrup. (Superior pouring properties? Seriously?) As an impoverished graduate student, I lived on a very tight budget, but I always kept real maple syrup in my home, even at the deluxe price of $1 an ounce.

We recently had the opportunity to visit a maple farm in Maine, Thurston & Peters.

Traditionally, maple sap was gathered in pails hung on taps stuck into the tree.

Maple trees

But modern maple syrup facilities have a network of tubes running from each tree into central collection tubes.

Maple trees

The central tubes run into the sugar shack, where a pump is pulling gallons of sap into a small tank.

Maple sap

This sap is visibly indistinguishable from water, and while I was fortunate to be allowed to taste it, it is completely flavorless. When it fills this tank, it is pumped through a filter into a larger holding tank.

Filtering the sap

Making maple syrup out of maple sap essentially boils down (pun intended) to two processes - 1) Concentrating the sugar and other tasty molecules and 2) Caramelizing the sugar. In days of yore, this was entirely accomplished by boiling down the sap. But given that maple sap is between 0.7% and 2.8% sucrose (the same sugar as found in table sugar), and given that maple syrup is 60% sucrose, that's a lot of boiling to concentrate your sugar 30-60 fold.

These days, the first step of concentrating the sugar and other tasty molecules is accomplished by reverse osmosis. It's much cheaper, and less energy intensive. The sap is concentrated to about 30% sucrose in this manner, and then it is poured into the maple syrup cooker.

Maple cooker

The syrup is boiled until it reaches a concentration of approximately 60% sugar. At this point, it is filtered through diatomaceous earth to remove any cooked chunkies. It is graded primarily on the color that it reaches while boiling down.

Maple batches

And from here, it can either be processed into maple candies (yum!)

Maple candy

or bottled and sold as syrup. We left with a bottle of syrup, at a vastly reduced cost compared to buying it in the grocery store.

Maple syrup

Do visit Harry Hartford at Thurston and Peters Sugar House if you have the opportunity. He is happy to chat with you at length, and he has some very interesting stories to tell, both about the process and history of maple syrup.

Thurston & Peters Sugar House
299 Bond Spring Rd
West Newfield, ME 04095

Two hours north of Boston, open weekends March 3rd through Saturday April 7th 9-5 PM (closed 4/8 Easter Sunday).


View Larger Map

By

06 March 2012

Back bacon (Canadian bacon)

Smoker

The first time I'd ever heard of "Canadian bacon" was after I had moved to the U.S. in 1997. I'm a Canadian. At home, we refer to it as "back bacon". Only recently I've learned that's because it comes from the back of the pig (as opposed to regular bacon, that comes from the belly of the pig). Canadians serve back bacon on pizza and with eggs for breakfast. Americans use it for Eggs Benedict (which will be making an appearance here soon, I hope).

So as we near the end of our first winter in Massachusetts, it makes some kind of sense to make food that is commonly associated with the land of Winter. I modified the recipe in Ruhlman's Charcuterie:
4 liters water
1 ½ cups kosher salt
1 cup sugar
1 ½ oz pink salt ← the curing salt containing sodium nitrite, not pink-colored salt
1 tbsp dried sage
1 bunch fresh thyme
6 garlic cloves, peeled and mashed
one 4-lb pork loin
Mix all the ingredients (save the pork loin), and bring to a boil. Stir until the salts are all dissolved, then remove from the heat. Cool to room temperature, then chill in the fridge.

Brine

When the brine is chilled, place the pork loin in it.

Pork loin

I warn you, brining pork looks gnarly. Really, not pretty.

Brining pork loin

Keep in the fridge for 48 to 72 hours. Then remove from the fridge, rinse the pork, and pat dry. Place back in the fridge for 12 hours to dry out a wee tad.

Brined pork loin

Fire up your smoker. I like mesquite for bacon, so that's what I used for back bacon.

Smoking pork loin

About two to three hours at 225°F, until the pork reaches an internal temperature of 150°F. Cool.

Back bacon

Slice thinly. I served it first on a nice bbq pizza (Hawaiian).

Hawaiian pizza

Salty and bright. Meaty, with a hint of smoke and thyme. This back bacon is awesome. It'll be figuring in a few other dishes over the next few posts. I wish I'd made this one ages ago.


By