30 December 2011

Portzelky

Happy New Year. These days, we celebrate New Year's Eve with a multi-course extravaganza. But as a child, New Year's Day meant one thing in our house. The Mennonite dish portzelky (pronounced por-tzell-chè - roll the r).

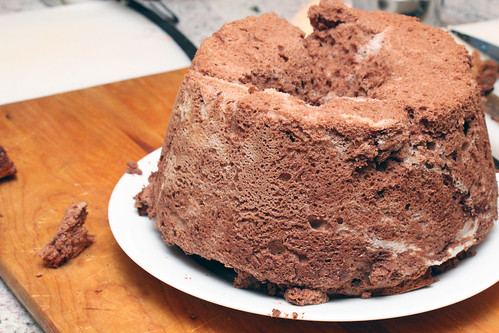
This dish is all about deep-fried, doughy goodness.  Yes, nothing says "I'm going to lose weight this year" quite like deep-fried raisiny goodness. But really, I had you at deep-fried, didn't I?

This recipe is one quarter of the recipe my mother gave me. This recipe gave enough portzelky for my wife, my son, my mum and I, and gave me another 10 portzelky I could bring in to work the next day.  What can I say, Mennonites are used to cooking for 15 young farm workers who know how to eat.
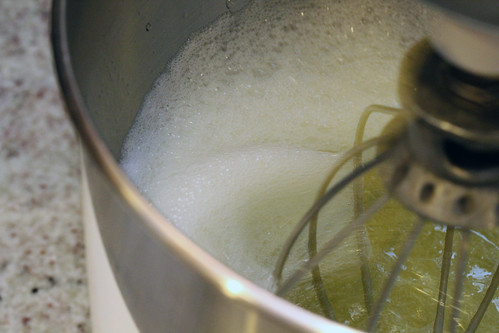
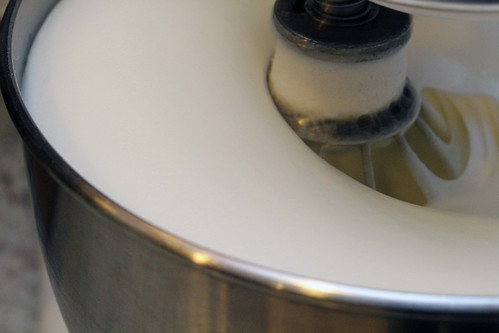
1 ½ tsp yeast softened in 1 cup warm water and a little sugar
½ cups milk, scalded and cooled
¼ cup cream, scalded and cooled.
2 eggs, well-beaten
18 cup sugar
pinch of salt
2 tbsp butter
½ lb. raisins
2 ½ cup flour enough to make a stiff batter
enough vegetable oil to deep-fry
Wake up the yeast in the warm water/sugar mixture for five to ten minutes.  Mix in the other liquids, and the well-beaten eggs. Mix the rest of the ingredients, except the raisins, until you have a thick batter.

Beat with a paddle mixer for five to seven minutes, you want to build up the gluten. Then add the raisins.

Portzelky batter

Cover and let rise for two hours at room temperature.

Risen portzelky batter

Heat up a pot of oil to 350°F.

hot oil

Scoop up a large soup spoon's worth of dough into the hot oil. You don't want too big a chunk of dough, or you won't get a properly crispy exterior to go with the cooked tasty interior.

Remember two things: 1) How much oil you heat up determines how many portzelky you can cook at a time. You don't want the dough to cool down the oil, so make sure the dough chunks are floating separately. 2) Remember, if you're acting scared that you're goinng to burn yourself, you're going to drop the dough from a high height and you're going to burn yourself. Be bold and lower the dough into the hot oil from near the oil.

Frying portzelky

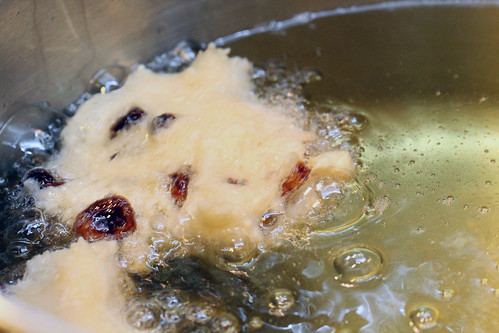
Turn the dough in the oil as it browns.

portzelky

You want a nice golden brown, crispy exterior.

Finished portzelky

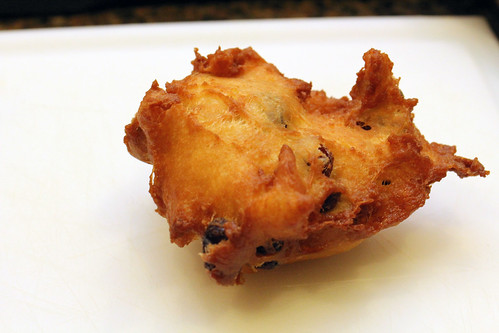
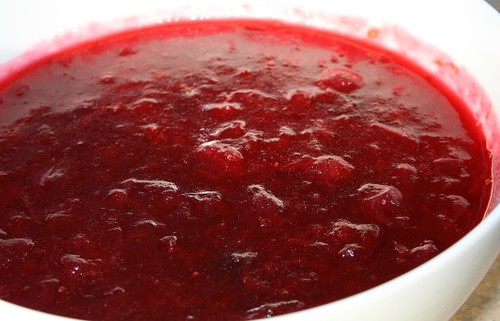
Remove when golden brown. Serve with a bit of golden syrup, or a dusting of icing sugar.

These crispy, yeast-dough fritters are a tasty way to bring in the New Year. Happy New Year.

06 December 2011

Chocolate-lover's angel food cake

Chocolate angelfood cake

Happy Holidays. We're well into holiday mode here in the Dude household. We just had our holiday party, complete with eggnog and dumplings.

A common dessert we serve this time of year, and a perennial favourite of Mrs. Dude is the chocolate-lover's angel food cake from Rose Levy Berenbaum's Cake Bible. So here it is. Mrs. Dude's favourite cake, a fluffy light mix leavened entirely by fluffy egg whites:

Cocoa
¼ cup + 1 tbsp unsweetened, Dutch-processed cocoa
¼ cup boiling water
2 tsp vanilla
1 ¾ cup sugar
1 cup sifted cake flour
¼ tsp salt
16 large egg whites
2 tsp cream of tartar
Pre-heat your oven to 350°F.

Mix the boiling water and cocoa. Whisk until smooth and paste-ish. Whisk in the vanilla and set aside.

Meanwhile, mix ¾ cup of sugar, flour and salt together.

Finally, in a large mixing bowl, mix the egg whites at low speed.

Egg whites

When they're unwhipped, they're all splashy and splorshy.

Egg whites

As they build body, turn up the speed on the mixer.

Egg whites

As they yield soft peaks, whisk in the cream of tartar. Soft peaks are ones that may drop a bit when you remove the beater. The cream of tartar drops the pH of the egg whites, stabilizing the peaks.

Gradually add the remaining sugar to the egg whites, while beating.

Egg whites

Continue beating until the egg whites have increased to a ridiculous volume, and created stiff peaks. Stiff peaks don't move even a tiny bit as you pull your beaters out of the eggs.

Remove about 1 cup of egg white, and mix well with the cocoa mixture.

Egg whites

Chocolate egg whites

Then, gently fold in the flour into the remaining egg whites, ¼ cup at a time. I like to use a flat whisk. The book recommends using a "balloon whisk", but even the mighty power of the Googles doesn't return a result for that. A flat whisk works well.

Egg whites

Now, mix the cocoa/egg white mixture into the batter, very gently.

Cake batter

Mrs. Dude likes a bit of swirl to the cake. The trick is to stop when you think it has the right amount of swirl.

Cake batter

Cake batter

Pour the batter into an ungreased 10-inch tube pan. Stab the batter with a knife a bunch of times to remove holes in the batter. Plus, you know, cake-stabbing.

Cake batter

Place pan in the oven. Bake for 40ish minutes, or until you stab it with a toothpick and the toothpick comes out clean (often as much as 50 minutes when I bake it).

Cake cooling

Remove the ridiculously large cake from the oven, and invert in a way that it can be supported on the top of the tube, without crushing the cake.

Cake cooling

I've constructed pretty ridiculous structures to get this to work. The one I show here is a ¼ cup measuring cup inverted on top of an upside-down KitchenAid bowl. I've seen wine bottles recommended, but they don't fit my tube pans. Good luck.

Cool the cake completely, then cut it out of the pan, running the knife around the outside of the pan, and the outside of the tube.

Cake removal

Invert onto a plate, gently shake, and... tada!

Chocolate angelfood cake

Serve with whipping cream and fruit.

Chocolate angelfood cake

Delicious.

By

29 November 2011

Catfish sandwiches

Mrs. Dude recently had another lovely birthday. She is more ravishing today than the day that I met her.

On her birthday, she can pick whatever she wants to eat. Some years it is complicated. Some years it is simple.

On this year, our year of moving, packing, unpacking, job-changing, settling in to a new city and all the excitement that has entailed, Mrs. Dude chose simple. She chose catfish sandwiches, bless her heart, a recipe that I first cooked for her in the late 1990s.
3/4 cup mayonnaise
3 tablespoons sweet pickle relish
1 ½ tablespoons drained bottled capers, chopped fine
1 tablespoon Dijon-style mustard
1 tablespoon fresh lemon juice, or to taste
a pinch of cayenne
1 tablespoon bottled cocktail sauce, or to taste

Mix the ingredients above to make the sauce.

Sauce

For the sandwich:
all-purpose flour seasoned with salt and pepper for dredging the fish
2 large eggs, beaten
½ teaspoon salt
¼ teaspoon cayenne
cornmeal for dredging the fish
four ½-pound catfish fillets, halved crosswise
vegetable oil for deep-frying the fish
8 soft sandwich rolls, split
soft-leafed lettuce for the sandwiches
2 tomatoes, sliced thin
16 slices of lean bacon, cooked

Slice the tomatoes.

Tomato

Fry the bacon until crispy. Set aside the bacon on paper towels until ready to serve.

Make several trays. One with flour. One with the beaten eggs. One with the cornmeal.

Dredge the catfish through the flour, until thoroughly coated. Then dredge through the eggs. Again, thoroughly coat. Finally dredge through the cornmeal. You'll have a nice, layered catfish fillet at this point.

cornmealed catfish

Put 2 inches of oil in a deep pot. Heat the oil in the pot to 350°F.

Hot oil

Set the fish gently into the hot oil. The trick with screaming hot oil is to not be afraid of it. If you drop the fish in from a height, you'll splash and burn yourself. Set the fish gently into the oil and you won't splash and won't burn. Really.

Fried catfish

Cook a few minutes (1-3) per side, until nicely browned.

Fried catfish

Remove from the oil after you've cooked on both sides. Set on a paper towel to drain.

Assemble the sandwich with a nice bread, sauce, lettuce, tomato, catfish and bacon. Mmmmmmmmm.... bacon...

Catfish sandwich

Served with:

Served with

Happy birthday, beautiful.
By

24 November 2011

How food stylists make gnarly food look edible


By

Thanksgiving preparation: Volume 4.

This is a re-post. As you finish your preparations for your turkey feast, don't forget the gravy. This is one you can mostly do in advance.

gravy

Smoked turkey provides a bit of a challenge when it comes to making gravy. How do you catch and maintain quality drippings and schmutz when you have your turkey on a grill? Clearly not insurmountable, but a bit of a challenge nonetheless. Well, why not skip that step entirely. A stock-based gravy, then. I use a small modification to Ruhlman's version of gravy, which you can make in advance, and if you're organized, doesn't need to be some crazy last step.
4 tbsp flour
6 tbsp butter
1 large onion
kosher salt as needed
heart and gizzards
1 cup white wine
4 cups turkey stock
Melt 4 tbsp of butter over medium heat. Add the flour, a bit at a time, whisking constantly. Continue to stir over medium heat while this roux darkens to a nice golden brown.

Remove from heat, and set aside the roux.

Meanwhile, finely mince the onion, the heart and gizzards.

Melt the remaining butter in a pan over medium heat. Sauté the onion until translucent. Toss in the heart and gizzard bits.  Turn up the heat to medium-high. Continue cooking, until you start to develop a nice layer of brown schmutz on the pan and on the outside of the meat, about 8 minutes.

Deglaze the pan with the wine. Stir to remove any delicious brown stuff on the bottom of the pan. When you've removed all the schmutz from the pan, add the turkey stock. Add back the roux, a bit at a time, until the sauce reaches the desired consistency.

Simmer over low heat for thirty minutes, to reduce slightly and to meld the flavours. Serve.

This gravy is easily as rich and flavourful as anything you make directly using drippings from the pan. And the convenience of making it a bit in advance, combined with the sheer ridiculous flavour, makes it a no-brainer to add to your turkey feast.


By

23 November 2011

Thanksgiving preparation: Volume 3.

This is a re-post. This is the real deal, getting ready to serve the bird for Thanksgiving.

I'm not much for the "traditional" ChristmasThanksgiving dinner. Turkey is far from my favourite bird. It's not as flavourful as goose, and certainly more dry than a duck. But I have a deal with my wife. If I make her traditional Christmas dinner, that is, turkey, cranberry sauce, salad, veggies and rhubarb pie, then I'm allowed to cook whatever I want for the rest of the holidays.

Well, what better way to heighten the flavour of a turkey, than to brine it and smoke it. I start the night before with a fresh, unaltered turkey. Three points to keep in mind before you start. First is that most turkeys have been extensively injected with salty chicken or turkey broth. While that makes the flavour stronger, it also makes them fairly salty. If you brine a pre-treated turkey, you'll create an inedible salt bomb. Secondly, don't forget if you're starting with a frozen turkey, it'll take a day per 5 pounds to thaw it in the fridge, and it needs to be thawed (or nearly thawed) when you place it in the brine. We started thawing our 10 pounder a day and a half prior to brining. Third, smoking takes longer than roasting a turkey. That said, for food safety sake, don't stuff your turkey, and don't smoke a bird bigger than 16 pounds. You'll need thirty minutes per pound, so anything bigger than that will be too long in the danger zone, and you don't want to serve your family a big poultry bag of Campylobacter. You really, really don't.

Okay, the brine:
1 ½ gallon water
1 ½ cup salt (2 ¼ cups Kosher or coarse salt - Kosher salt is flaked to make it less dense)
¾ cup sugar
½ cup dried tarragon
1 ½ tsp black pepper
Boil the water to get rid of any chlorine in it. Let cool to room temperature. Mix in the salt and sugar until they're dissolved. Add the tarragon and pepper. Place in a large container. (I reserve a bucket just for brining a turkey every year - it's carefully labeled, to ensure we don't use it to bleach the floor):

food only

Place in a sink, so that when you add the turkey to it it doesn't overflow all over the kitchen counter. Not speaking from experience, or anything. Nope. Nope. Didn't happen to me *ever*. (At least, not since the first time).

Brine

Remove the turkey neck and the bag with the guts in it, (I save the neck and heart for making gravy). Submerge the turkey in the brine, and place back in the fridge. Leave in the brine for approximately twelve hours.

The next morning, remove the turkey from the brine, briefly rinse in the sink, and pat dry.

Clean the turkey

When dry, rub the bird down with olive oil. This will crisp the skin up nicely, as there's not enough fat in turkey skin to make it nice. Truss or not. I won't discuss trussing, because my trussing skills are pretty rough (see the photos). Fire up your smoker to a toasty 225°F. Place the bird breast side up in your smoker. We're using indirect heat here. I use wet hickory for smoke (hickory that's been soaking a few hours in water) and charcoal (not briquettes - it's easier to control the heat with lump charcoal) for heat.

Turkey on the smoker

Smoke for thirty minutes per pound. Half way through, open up the smoker and and rotate the bird so the other side of the bird is facing the heat source.

This photo is at about three quarters done:

Smoked turkey

Sadly, photos taken after this point aren't beautiful (it got dark, and I had to use a flash). But look at that turkey deliciousness!

Take the bird down when a meat thermometer shows 180°F at multiple checked points (don't start checking too early, you don't want to put too many holes in this bird!). Let the bird rest 10-15 minutes before carving. Carve and serve.

These days, this is the only way I enjoy turkey. The smoke adds a reallllly great flavour, and the brine makes the bird salty and moist. Roast turkey is truly bland and boring in comparison. The other bonus point? Having the bird on the smoker leaves the oven free to make pie or bread or any number of other things. It's like having a second oven for the holidays.

Delicious!


By

22 November 2011

Thanksgiving preparation: Volume 2.

As we prepare for Thanksgiving, we can't forget the appetizers. This is a repost of a delightful appetizer to serve your guests before dining on turkey.

I'm in danger of seeming a miso fanatic.  But it's a tasty source of umami flavours, and, well...  Umami!

We recently had the great fortune to dine at Morimoto Napa, while visiting the lovely wineries of Napa Valley.  It's a pity I forgot my camera in the car, because in addition to being one of the tastiest meals of my life, it was also one of the most beautiful.  But none of the dishes was more magnificent than the bagna càuda.  It was an umami bomb coated in vegetable oil.  A little blob of brown paste at the bottom of a ceramic container, covered in a deep layer of olive oil, and warmed by a candle underneath, this stuff was like heaven.  Rich, sweet, delicious.  A hot dip for the perfect and crisp vegetables that were served.  And when I asked the server what it was, he said it was a dip made of anchovy paste, miso and dashi.  Well here's my attempt to re-create that delightful umami bomb.

Traditional bagna càuda is (according to the Wikipedias) Piedmontese for "hot sauce":
The dish, which is served and consumed in a manner similar to fondue, is made with garlic, anchovies, olive oil, butter, and in some parts of the region cream.
I used the bagna càuda recipe in Morimoto: The New Art of Japanese Cooking as the starting point, and modified it, more olive oil (though most of it not mixed in), plus red miso - I had no dashi on hand for this attempt:
3 large heads garlic
1 cup whole milk
½ cup extra virgin olive oil
2 tsp anchovy paste
½ tsp red miso
salt and pepper
veggies
Crush and peel the cloves in 3 large heads of garlic.

Crushed garlic

Cover with water, and bring to a boil.

Blanching garlic

Discard the boiling water, and retain the garlic. Repeat twice. These steps extract some of the stronger, bitter flavours of the garlic, and mellows it a bit. It also extracts a tiny bit of the color, resulting in pure white gloves of garlic.

Blanched garlic

Now pour in the milk.  Bring the milk to a boil, and boil for ten minutes, or until the garlic is tender.  Discard all but 1 tbsp of the milk.  Again, this extracts some of the fat soluble bitter compounds.  This is going to be some very mellow garlic.

Purée the garlic in a food processor until smooth.  Add the anchovy paste, the miso, the reserved milk, salt and pepper to taste and 2 tbsp of olive oil.  Purée until smooth.  Refrigerate until ready to serve.  When ready to serve, place some of the paste in a small serving dish.  Heat in the microwave (or over a candle, if you have such an apparatus).  Heat the remaining olive oil on the stove until hot and cover the hot paste with hot olive oil.  Serve immediately with fresh chopped vegetables.

Bagna cauda

This was really great. Very tasty, but missing something. It wasn't as dark in colour or rich in depth of flavour as what we had at Morimoto Napa. Still, we all ate a ton of this.  When I asked Mrs. Dude, "If what we had at Morimoto was an A+, and and F is the bottom grade, where does this fit?" She thought for a moment, "B-". Okay, well clearly I have some work to do to get this up to par. But really, if on any scale that Morimoto ranks an A+, I get a B-, I suppose I can't be too sad.

I'll be working on this recipe some more. Stay tuned.


By

21 November 2011

Thanksgiving preparation: Volume 1.

This is a repost. So, we're getting ready for Thanksgiving here in the Dude household. I cook the Thanksgiving meal, despite the fact that I'm not the American in the family. But here we go, what do we prepare first? My dad's cranberry sauce. You have to have this sauce with your turkey. Get it ready early, it keeps in the fridge for several weeks.


Cranberries

I was 25 before I ever tasted canned cranberry sauce. Jiggly. Bland. Gelatinous. Yuck. I can understand why cranberry sauce is an afterthought for most folks. In our home, it's a centerpiece.

Thanksgiving and Christmas were enormous food events for my family when I was a child. My mother would make turkey, gravy, corn, salad, broccoli, bubbat and pumpkin pie. My father would make cranberry sauce. Cranberry sauce was a religious thing for him. He would make enormous pots of the stuff, and wouldn't only serve it for holidays. Cranberry sauce was a year round thing for us. And rightly so! This cranberry sauce will change your life.

Dad's cranberry sauce started with the recipe in the old version of the Joy of Cooking, but was refined to be less sweet and more bright. I think you'll amaze your guests with this recipe:

Sort the cranberries. While they ship well, I find fresh cranberries often contain as much as one fifth rotten berries. Wash them and measure them.

Washed cranberries

Use the following ratio:
1 23 cup water
45 cup sugar
4 cup cranberries (sorted and washed)
Mix the water and sugar in a heavy pot. Bring to a boil, until the sugar dissolves. Then add cranberries.

Boiling cranberries

Lower to a simmer. Continue to simmer for 30 or so minutes, stirring periodically. Use the spoon to crush the cranberries. You don't want a homogeneous mixture, but a nice lumpy sauce, with mostly broken berries but a very few whole ones.

Saucing cranberries

Zest some lemons and oranges to make:
2 tsp lemon zest
3 tsp orange zest
Orange and lemon

You'll want to add the zest last, as the longer you cook it, the more the zest flavour dulls.

Orange and lemon zest

Stir in the zest, and taste. Adjust the sugar and zest to taste. Let cool, and serve at room temperature or cold. (We generally make this ahead of time, but it's not much work and can easily be done while cooking a turkey).

Cranberry sauce

Thanks for the recipe, Dad.


By