Showing posts with label appetizer. Show all posts

07 January 2014

Mashed potato soup

I'm not generally a fan of the starches (except homemade bread - I love homemade bread). Baked potato. Mashed potato. Rice. I'm not a huge fan. But when I read the recipe for Morimoto's potato soup, I knew I had to try it (adapted from his Morimoto: The New Art of Japanese Cooking). This is one of the best things I have ever cooked.

Morimoto starts out the section with a fairly hilarious quote:
I must confess I have a weakness for luxurious foods like lobster, caviar and foie gras. But I also respect the humbles of ingredients. Their plainness offers me a different kind of challenge. Here a simple potato is transformed into an elegant soup you could serve at any dinner party.

Of course, the recipe also includes caviar, which certainly helps elevate the humble potato.

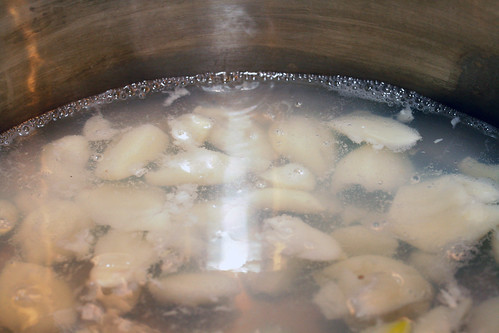
First, the broth. The broth is a simple dashi-based broth. The genius who first decided to boil kelp and fish flakes should be honored with the status of a demi-god.
4 cups water
½ cup loosely packed bonito flakes
1 piece 4x6 inch kombu
1 large baking potato
1 ½ sticks unsalted butter
¾ cup half and half
2 tbsp sake
3 tbsp light-colored soy sauce
salt
1 oz caviar
wasabi
chives

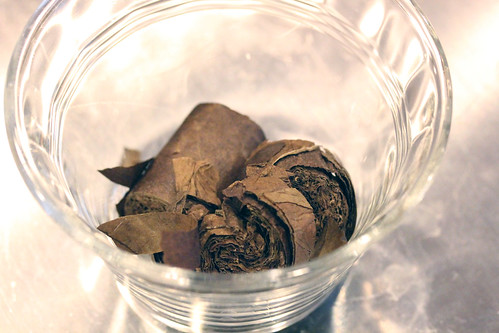
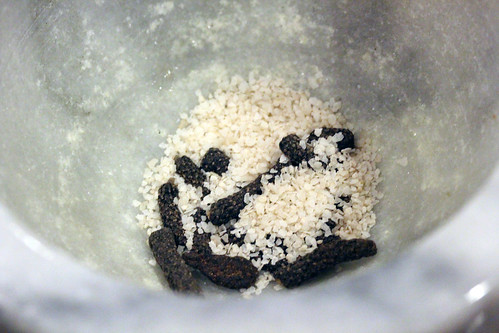
Kombu and bonito flakes are available at Japanese and Korean grocery stores. At H-Mart in Massachusetts, there is a kelp section of the store, where you find the kombu. The bonito flakes (dried, shaved fish flakes) are in the seasoning section. Kombu:


And bonito flakes:


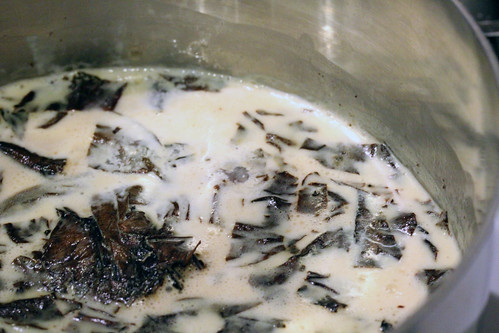
Rinse off the kombu. Place into a pot with the 4 cups water, and bring to a boil. Boil for 10 minutes (until it starts to make your kitchen smell like a wharf), and then remove from heat. Add the bonito flakes, and stir. Allow the mixture to cool (20 minutes or so). Strain the liquid into a different pot to remove the kelp and bonito flakes. Don't be alarmed by the smell, the broth will be delicious.

Meanwhile, take a baking potato, and stab it with a fork a few times.


Steam until soft (20-30 minutes). Remove from heat, and remove the skin from the potato. Mash the potato, and then force it through a potato ricer or a fine sieve.


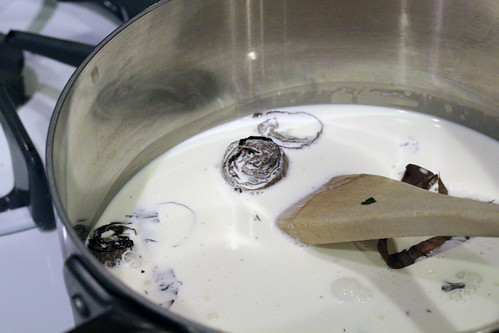
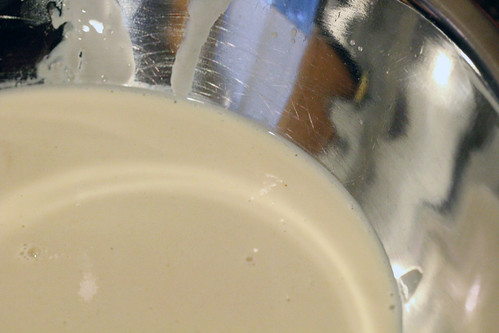
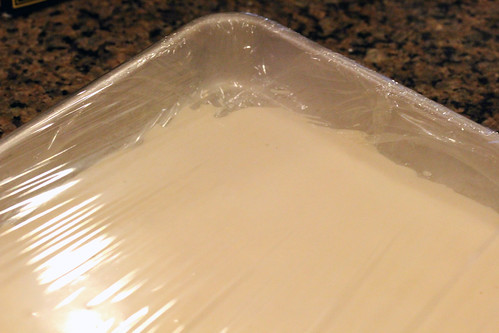
Heat the butter and cream in a pot until melted. Whisk in the sieved potato. At first it will float around in the cream, but as you continually whisk, it will turn into a syrupy goop. Continue whisking until it has the texture of a polenta.


Meanwhile, reheat the broth. Season with sake and soy sauce, and salt to taste.

When the potatoes come together in a thickened consistency, scoop it into the centre of the bowls you're serving it in (this makes 6 nice appetizers). Pour broth around it. Add a scoop of wasabi, some chives and a scoop of caviar to the potato. Serve.


This will be a repeat in our house. Very super delicious.


By

30 October 2012

Pulled pork fishsticks

Pulled pork fishsticks

We first visited Joe Beef in Montréal a few months ago. It's a fun, meat-centric restaurants, with over-the-top, creative dishes and cocktails. I purchased their book, The Art of Living According to Joe Beef: A Cookbook of Sorts as soon as it was available, and have been salivating over their dish, pulled pork fishsticks, ever since. But I needed a proper occasion to cook this over-the-top dish.

Here's how it works. You make pulled pork. You smoke a pork butt for 8 hours and then pull it. Then you mix it with bbq sauce and dissolved gelatin. You form them into a tray and allow them to gelatinize. Then you cut them into sticks, bread them and deep fry them.

Well, our occasion arrived, in the form of Foodapalooza 2012. I'm going to present a slightly modified version from what I made, as I wasn't thrilled with Joe Beef's bbq sauce, but this is inspired by their recipe, and is guaranteed to delight meatlover's everywhere:
½ of a pulled pork butt
¾ cup pulled pork bbq sauce
3 tbsp finely chopped shallots
3 sheets gelatin
salt and pepper
2 cups all-purpose flour
2 tbsp Old Bay seasoning
2 eggs
2 cups panko bread crumbs
canola oil for deep frying

Pork butt sauce

Soak the gelatin sheets in icewater while warming the bbq sauce in a small saucepan. When the sauce starts to boil, remove from heat. Squeeze the icewater out of the gelatin, and add the gelatin to the sauce. Stir until the gelatin dissolves.

Pulled pork

Mix the sauce, pulled pork and finely chopped shallots. Mix very well, and check the seasoning. Adjust with salt and pepper. Line a small sheet pan with plastic wrap. Press the meat into the pan, making it about ½" thick all throughout the pan. Push the meat together tightly. Chill overnight.

In the morning, remove the plastic wrap from the pan, and remove the meat from the plastic wrap. Slice into fishstick-sized pieces (I cut these into 21 pieces). Set up a breading station. First bowl has the flour and Old Bay seasoning. Second has the eggs, beaten until foamy. Third has the panko bread crumbs. While you're heating the oil in a pan, bread the sticks. Coat them with flour, then coat them with egg, then coat them with panko bread crumbs.

When the oil hits 350°F, fry the sticks in small batches until the bread crumbs are a nice brown colour. Fish out of the hot oil, and set on paper towels to drain for a few moments. Serve.

Deep-fried, smoky, acidic goodness. This is a decadent little meat-bomb, and it's guaranteed to please.

Pulled pork fishsticks

By

04 September 2012

Oysters

We're settling in and becoming locals in New England. We enjoy the local bounty, and here the local bounty includes oysters (and numerous local places that sell them). At New Deal fish market we picked up several different kinds of oysters, including Cape Spears (from New Brunswick - brown oysters below), Moon Shoals (green below).

Cape Spear & Moon Shoal

And our often favourite, Wellfleets.

Wellfleet

For my birthday this year, Mrs. Dude purchased me the means to have oysters in our home. She got me a Wusthof Oyster Knife and a bucket of oysters. I can't say enough good things about being able to shuck and eat oysters at home. Oysters are a tad tricky to open, but with the right equipment, it doesn't need to be dangerous. I watched a few videos, and this cheesy 80s video is one of the better ones.


We did one thing differently. In the interests of saving the tendons in my hand, my lovely wife bought me a chain-mail glove. In one afternoon, this glove prevented at least 6 trips to the emergency room, so if you don't have the hands of a surgeon, I'd recommend the glove.

Opening an oyster

We don't do much with them, merely serving with a touch horseradish and cocktail sauce. What a luxury, to be able to eat these at home.


By

10 July 2012

Embarrassingly simple grilled portobellos

Well, and so here we are in July, and it's definitely barbecue season. Indirect Heat has been getting a lot of traffic, and most of my recent posts have been non-bbq related.

But we have been barbecuing. Some old recipes and new ones. Here's an old one...

Nearly 15 years ago, when I was bartending at Valhalla in Houston, we would have a few bartender parties ever year. We were all grad student volunteers, so the biggest benefit to bartending was the parties. Free beer and free food. Well one of the bartenders was a former chef and current martial arts teacher, and he was given a budget to feed us. Most of the grad students at these parties were interested in the free beer, but the food was pretty awesome. At one particular party, I hit up the chef and asked him, "These grilled mushrooms are amazing, what's the recipe?"

"I'm almost embarrassed to tell you. It's really simple."

"How so?"

"No, it's really embarrassingly simple..."

"Okay..."

So here it is:
Portobello mushrooms
Italian salad dressing
Get the best portobellos you can.

Mini portobellos

Peel the skin and the gills off.

Trimming portobello

Chop into large chunks. You want them not to fall into the grill slats. And toss the mushrooms with Italian dressing all over.

Marinating portobello

Heat a grill to screaming hot, however is your favorite method. (I use charcoal grill, started with a chimney starter
).

Grill, maybe two minutes a side, just until you have grill marks on the mushrooms.

Grilling portobello

Serve while screaming hot.

Grilled portobello

When you bite into them, and the molten hot juices spray into your mouth, well... it's dangerous but embarrassingly delicious. I don't often post "simple" recipes, but this is one. And it's pretty awesome.

By

27 March 2012

Fried smelt

While strolling through my local Whole Foods, gazing at the various different sea critters available for dinner, I heard an older man very animatedly extolling the virtues of smelt. "Oh, I grew up in Seattle. We'd serve them for breakfast. Just put a batter on them, deep fry them and eat them. They weren't cleaned like they are here, we'd eat the whole thing. I love them."

After a brief discussion with him, I bought a pound of smelt.

Smelt

The older man in the store emphasized simplicity when cooking smelt, so I kept it simple, using an adaptation of what I found at Steamy Kitchen.
¾ cup corn meal
¼ cup flour
2 teaspoons garlic powder
1 teaspoon salt
1 pound smelt
2 tablespoons butter
handful fresh thyme, minced
2 cloves garlic
1 whole chili, minced
salt and pepper
juice from 1 lemon
olive oil
Mix the corn meal, flour and garlic powder.

Breading

Dredge the smelt through the breading, and gently set aside.

Breaded smelt

Meanwhile, melt the butter and heat the garlic in the butter. Toss in the thyme, salt and lemon juice, and reserve warm.

Heat ¾" of olive oil until hot enough to fry. (You want it around 350°F). Set the smelt into the hot oil gently (so as not to splash - remember, the trick with hot oil is to get your fingers as close as possible to it so you're not dropping stuff in - you're actually less likely to burn yourself this way).

Frying smelt

Fry the smelt 2 minutes on a side, and remove from the hot oil. Drain briefly on a paper towel, then plate them. Drizzle the lemon/butter sauce over top of the smelt, and season with salt and pepper.

Serve immediately.

Fried smelt

So, I loved these. They're crisp and salty and hot and delicious. Bbq Jr. also couldn't get enough of these. Mrs. Dude was a little off put by the texture of eating a whole fish with bones. I think the next time we have this, Mrs. Dude will be on a trip...


By

17 January 2012

Lime-basil sorbet

Lime basil sorbet

Way back in the distant past... 2009 to be exact... Dr. Ricky and I prepared a gigantic feast for our friends in San Diego. Between courses of sea urchin and gailan, we palate cleansed, leading to the quote of the evening:

"I could cleanse my palate all night!"

Well, we had a pretty meat-heavy menu here on New Year's Eve, (and the author of the above quote was a return guest), so we decided to serve another palate cleanser. A wee serving of lime-basil sorbet.

I modified the recipe from a citrus sorbet in The Perfect Scoop:
2¼ cups water
¾ cup sugar
zest of 2 limes
¾ cup freshly squeezed lime juice
2 tbsp vodka
1 large bunch fresh basil
Combine the water, sugar, and zest in a pot. Bring to a simmer over medium heat, stirring to dissolve the sugar. Crunch up the basil bunch to break the leaves, then toss into the pot. Cover the pot and remove from heat, allowing it to cool over an hour or so.

Add the fresh-squeezed lime juice and vodka, and pass the syrup through a fine sieve. Reserve the syrup in the fridge covered, overnight. I also placed small shot glasses on a tray, and set them in the freezer overnight.

Shot glasses

The next day, run the syrup through your ice cream maker. With the KitchenAid Ice Cream Maker that means that you chill the ice cream maker in the freezer for two days, then add the syrup to the ice cream maker while it is mixing at low speed.

Churn for 10-30 minutes, until it reaches a desired consistency. Scoop the sorbet into the frozen shot glasses, cover, and chill in the freezer covered for at least 12 hours before serving.

Lime basil sorbet

When you serve, treat this as a light palate cleanser between heavy, flavourful courses. The bright acidity of it will reset your guests' palates, readying them for more.


By

10 January 2012

Dates with goat cheese and bacon

Dates with bacon

Planning a large meal can be tricky. How do you ensure that 10 or more courses all come out at the same time. It's important that you have a few dishes that you can make entirely in advance, and a few dishes that are quick and easy to make and assemble. As part of our appetizer round for our New Year's extravaganza, we whipped out an old standby. Dates with goat cheese and bacon.

This is a simple dish that has only three simple ingredients. That makes it critical that you find the highest quality ingredients you can. Dates in particular, which can readily be found in high quality in southern California, can be found stale in stores in Boston. They should be juicy and sweet. If they're dry or bitter, get new ones.
dates
goat cheese (like Bucheron)
bacon (I prefer to use homemade)
Execution is simple. Pre-heat the broiler in your oven.

Slit the dates lengthwise, and pull the date pits out. Schmear as much goat cheese into the dates. Wrap the dates with half-strips of bacon, and pin them closed with a toothpick.

Place on a cookie sheet, and bake in the oven. It takes only a few minutes for the bacon to crisp up, the cheese to soften and the dates to soften.

Serve hot.

By

22 November 2011

Thanksgiving preparation: Volume 2.

As we prepare for Thanksgiving, we can't forget the appetizers. This is a repost of a delightful appetizer to serve your guests before dining on turkey.

I'm in danger of seeming a miso fanatic.  But it's a tasty source of umami flavours, and, well...  Umami!

We recently had the great fortune to dine at Morimoto Napa, while visiting the lovely wineries of Napa Valley.  It's a pity I forgot my camera in the car, because in addition to being one of the tastiest meals of my life, it was also one of the most beautiful.  But none of the dishes was more magnificent than the bagna càuda.  It was an umami bomb coated in vegetable oil.  A little blob of brown paste at the bottom of a ceramic container, covered in a deep layer of olive oil, and warmed by a candle underneath, this stuff was like heaven.  Rich, sweet, delicious.  A hot dip for the perfect and crisp vegetables that were served.  And when I asked the server what it was, he said it was a dip made of anchovy paste, miso and dashi.  Well here's my attempt to re-create that delightful umami bomb.

Traditional bagna càuda is (according to the Wikipedias) Piedmontese for "hot sauce":
The dish, which is served and consumed in a manner similar to fondue, is made with garlic, anchovies, olive oil, butter, and in some parts of the region cream.
I used the bagna càuda recipe in Morimoto: The New Art of Japanese Cooking as the starting point, and modified it, more olive oil (though most of it not mixed in), plus red miso - I had no dashi on hand for this attempt:
3 large heads garlic
1 cup whole milk
½ cup extra virgin olive oil
2 tsp anchovy paste
½ tsp red miso
salt and pepper
veggies
Crush and peel the cloves in 3 large heads of garlic.

Crushed garlic

Cover with water, and bring to a boil.

Blanching garlic

Discard the boiling water, and retain the garlic. Repeat twice. These steps extract some of the stronger, bitter flavours of the garlic, and mellows it a bit. It also extracts a tiny bit of the color, resulting in pure white gloves of garlic.

Blanched garlic

Now pour in the milk.  Bring the milk to a boil, and boil for ten minutes, or until the garlic is tender.  Discard all but 1 tbsp of the milk.  Again, this extracts some of the fat soluble bitter compounds.  This is going to be some very mellow garlic.

Purée the garlic in a food processor until smooth.  Add the anchovy paste, the miso, the reserved milk, salt and pepper to taste and 2 tbsp of olive oil.  Purée until smooth.  Refrigerate until ready to serve.  When ready to serve, place some of the paste in a small serving dish.  Heat in the microwave (or over a candle, if you have such an apparatus).  Heat the remaining olive oil on the stove until hot and cover the hot paste with hot olive oil.  Serve immediately with fresh chopped vegetables.

Bagna cauda

This was really great. Very tasty, but missing something. It wasn't as dark in colour or rich in depth of flavour as what we had at Morimoto Napa. Still, we all ate a ton of this.  When I asked Mrs. Dude, "If what we had at Morimoto was an A+, and and F is the bottom grade, where does this fit?" She thought for a moment, "B-". Okay, well clearly I have some work to do to get this up to par. But really, if on any scale that Morimoto ranks an A+, I get a B-, I suppose I can't be too sad.

I'll be working on this recipe some more. Stay tuned.


By

20 January 2011

Marrow bones

Here's an appetizer that'll blow people away. And it's crazy easy. As best as I can tell, there's only one disadvantage to this one. It's kinda nasty looking. So serve this by candlelight.

Marrow bones. You can either carve them off a beef shank, or special order them from your butcher. Either way, you shouldn't have to pay much for them. My recipe is modified from Bones.
4 shank bones
salt
bread
Yep, that's it. Simplest. Recipe. Ever.

Raw marrow

In a small container, cover the bones with water. Add 2 tsp of salt. Soak for 12 to 24 hours in the fridge.

Brined marrow

Remove your brined (and what looks like bleached) bones from the water, pat them dry and place them on an oiled cookie sheet.

Pre-heat your oven to 450°F. Bake the bones in the oven for 15 to 25 minutes. Until the marrow is bubbling slightly and it leaves goo on a tester inserted all the way through.

Roasted marrow

Spread the roasted marrow on a piece of toasted homemade bread. Sprinkle with fleur de sel. Serve.

Toast with marrow

You're really gonna want to serve this in a dimly lit room. It's, um, kinda grotey lookin'. But rich and delicious. I mentioned bone marrow to a colleague at work today, and he said, "Yeah. Bone marrow is rich and lusty." Well, I wouldn't say it that way. But I guess I don't disagree.

18 January 2011

Smoke, tobacco and blackberry

I've been rather enamoured of Grant Achatz' Alinea cookbook since it came out over a year ago.  His cooking is quite novel, and for someone like me who is interested in smoked food, he incorporates smoke in some pretty interesting ways. The most interesting dish in the book, in my humble opinion, is Smoke, tobacco and blackberry (perhaps not surprising for a smoked meat fiend):
1 ½ cups cream
½ cup milk
¼ cup sugar
¼ tsp kosher salt
5 g cigar (about ½ of a short cigar)
10 blackberries
5 gelatin sheets
1 tsp long thai peppercorns (as described here)
1 tsp smoked salt
mint leaves

This dish uses the flavour of a cigar in the dish. What can I say? It's a novel use of smoke in food...

Chop the cigar

Chop up the cigar.

Chopped cigar

We're going to steep the cigar in cream, milk, sugar and salt to get the flavour of it out.

Cream with cigar bits

Bring the mixture to a boil.

Steeping cigar leaves

When it comes to a boil, turn off the heat, and cover the mixture. Allow to steep for twenty minutes. Meanwhile, put the gelatin sheets into ice water to hydrate.

Gelatin sheets

I prefer gelatin sheets over powder simply because they go into solution more easily, and you're less likely to find a chunk of non-dissolved gelatin later.

After twenty minutes have elapsed, remove the gelatin from the ice water and squeeze out the excess water. Stir the gelatin into the steeped cigar mixture, then pour the whole thing through a sieve, to remove the cigar chunks.

Steeped cream

Line a half cookie sheet with cling wrap, and pour a thin layer of the gelatin mixture into the pan. Cover and reserve the rest of the mixture. And put a layer of cling wrap over the gelatin in the cookie sheet, being careful to keep it tight enough that it doesn't touch the cream.

First gelatin layer

Now, finding a perfectly level place in your fridge to solidify the gelatin can be challenging. Having failed at this on more than one occasion, I use the following technique: Put some ice cubes on one end of a large cookie sheet. Gently place the smaller cookie sheet in that pan, and pour some water over the ice, being careful not to get water into the smaller pan. Basically, you're creating a chilling space under the pan, so you can harden the gelatin on your level countertop.

While it is chilling, prepare the blackberries.

Surgically remove the base of the blackberries so that they are perfectly level. Gently set the blackberries onto a piece of paper towel, cut side down.

Surgically altered blackberries

After the gelatin has solidified, remove the small pan from your chilling apparatus, and uncover. Pour the remaining liquid gelatin over the solidified gelatin, and immediately place the blackberries cut side down into the gelatin.

Embedded blackberry

Cover, and place back in your chilling apparatus until the gelatin sets (after that, you can store in the fridge). Before serving, combine the smoked salt and thai peppercorns in a mortar, and grind into dust.

Smoked salt and thai peppercorns

Using a small round, cut out each blackberry, surrounded by cream. Gently place on a plate, sprinkle with the salt and pepper mixture, and set a mint leaf on it.

Blackberry, smoke and tobacco

Serve. What a unique flavour. Smoky and salty, with a bright blast from the blackberry. This is delicious, and much like Achatz' other dishes, best served one per person, as just a single bite.