27 May 2010

Zumbar Coffee

I've been keeping a secret from the internets.  I've been a bit nervous to share my secret, as I don't want them to get too crowded.  In a non-descript strip mall, hidden practically under I-5 in San Diego, is probably the finest coffee place in San Diego.

Zumbar

You might hardly even notice it - it's labeled "Coffee Shop".  This is Zumbar.

Do you remember "Cheers"?  This place is like Cheers.  Only good.  And clean.  And with coffee instead of beer.  And with little pastries and rugelach.  You walk in, and the baristas yell "NORM!".

Okay.  Basically, it's nothing like Cheers.  But the clientele there is almost exclusively made up of regulars drawn from the local biotech community.

The real draw is the house-roasted beans that are expertly extracted to make outrageously tasty lattes.

Latte

And if froofy coffee drinks are your thing, like Mrs. Dude, they make a wicked caffe mocha.

Mocha

Check them out.  But be warned: once you try Zumbar, you'll never go anywhere else for coffee.


View Larger Map

25 May 2010

Bbq short ribs

The most relaxing days for me are days I can stay home and smoke some meat.  I tend fire.  Read.  Toss a ball around with Bbq Jr.  But I can't go far, because I have a fire to tend.  And a day that I don't get in the car is a success all around.

Today, it's beef short ribs.  This recipe is adapted from Smoke & Spice by Cheryl and Bill Jamison.  Start with 10 lb of bone-in short ribs (will feed around 10 folks, unless they're all 17-year old boys).

Short ribs

Bring them up to room temperature while you light a fire on your smoker. We're cooking with indirect heat today. Fire on one side, meat on the other. Wet some mesquite chunks for smoke, and then prepare the rub. It's a mix of:
¾ cup paprika
¼ cup freshly ground black pepper
¼ cup coarse salt
¼ cup sugar
2 tbsp chili powder
2 tbsp garlic powder
2 tbsp onion powder
2 tbsp cayenne
Rub

Mix.

Rub, mixed

Rub that good stuff all over those short ribs, and set them on the grill, bone-side down, away from the fire.

Smoking short ribs

Tend that fire to keep it smoking, and keep the temperature around 200 °F.  You're going to need to cook 'em for 5 - 6 hours.  Each hour, you're going to open up the grill and mop the meat with a mop liquid (I've got a smoking box, so I don't need to open the grill to tend the fire).  The mop liquid will consist of:
1 bottle of beer
½ cup cider vinegar
¼ cup vegetable oil
½ medium onion, chopped
4 garlic cloves, minced
1 tbsp Worcestershire sauce
1 tbsp rub (from above)
Open each hour.  This is the first hour, pre-mop:

Smoking short ribs

Look at that, starting to sweat a bit.  Yum!  Now, 2 minutes later, post-mop:

Mopping short ribs

Hour 2, pre-mop:

Smoking short ribs

Hour 3, pre-mop:

Short ribs

Meanwhile, make the glaze:
1 ½ cups ketchup
1 cup beer
¾ cup cider vinegar
¼ cup minced cilantro
3 tbsp brown sugar
2 tbsp Worcestershire sauce
2 garlic cloves, minced
2 tsp ground cumin
1 ½ tsp ground anise
1 ½ tsp salt
1 tbsp Tabasco
You'll need this for the final opening.

Hour 4 ½, pre-glaze:

Short ribs

Hour 4 ½, post-glaze:

Glazing short ribs

Hour 5 ½.

Smoked short ribs

If that doesn't look crazy-good to you, you're a vegan.  Yum!  These are a nice, bright preparation of short-ribs.  Acidic, and slightly spicy.  Meat just melts in your mouth.  Really, really tasty.

Served with:

Wine


22 May 2010

A lazy Saturday calls for...

a pomegranate cosmopolitan!

So, I appear to have arrived in the blogorama big times.  The lovely folks at PomWonderful sent me some free samples to play with (so take whatever I say about pomegranate juice with a grain of salt).  And you know, once you're getting free juice, you've arrived.
1 oz vodka
½ oz Cointreau liqueur or triple sec
¾ oz pomegranate juice
½ oz fresh lime juice
Pomegranate martini

Mix over ice.  Shake.  Pour.  Serve.

This drink is a lot like a standard cosmopolitan.  Citrus-ish.  Bright.  And a tad sweet for my tastes, but I'm quite certain that folks who like cosmos will enjoy this.  Happy Saturday.

20 May 2010

Lemon sorbet

A number of years ago, I travelled in Italy with friends. We would eat four hour, multi-course dinners. At one place, they served a sorbetto di limone that was absolutely outstanding. Bright, and acidic, it cut through some of the grease of the pizza we'd had earlier. We asked for another round of sorbet. "No! One is enough!". They cut us off. Of sorbet. They were appalled that we wanted more.

So now I make it at home.

Living in southern California really has its advantages.  We were at our friends' home this weekend, helping them with their garage sale.  Mrs. Dude and I started talking about grocery shopping, and I told her I needed a dozen lemons to be able to make lemon sorbet.

"We have lemons in our backyard, if you want."

"You do???"

These lemons were beautiful.  Lumpy and assymetrical, with more spongy skin than the thick-skinned grocery store lemons, they all smelled incredible.  We took a dozen of them home, and when I opened the bag they were in, our whole kitchen smelled of lemons.  Look at them, they're beautiful!

Fresh lemons

These made an incredible sorbet.  I modified the recipe in David Lebovitz' The Perfect Scoop.  For 2 quarts of sorbet:
5 cups water
2 cups sugar
zest of 4 lemons
2 cups freshly squeezed lemon juice (took 8 of these magical lemons, normally takes about 12)
2 tbsp vodka
Zest the four lemons.

Lemon zest

Then juice them, plus however many more you need to make the 2 cups of lemon juice.

Lemons

Place the lemon juice in a non-reactive container in the fridge.  Meanwhile, combine the sugar, 2 cups of water and the lemon zest.  Heat over the stove, stirring until the sugar dissolves.  Immediately add the cold water, cool to room temperature, add the vodka (the vodka keeps the sorbet from freezing too hard).

vodka

Chill in the fridge, 6-18 hours.

Mix the lemon juice and the zest syrup.  Run through a sieve, to remove the chunkies, and then run through your ice cream maker.

Ice cream maker

With the KitchenAid Ice Cream Maker Attachment, it takes about 25 minutes of mixing to get a nice, soft sorbet.  Transfer to a container, and freeze overnight to solidify.

Lemon sorbet

Serve.

This sorbet is awesome. It's not very sweet, and the acid from the lemons comes screaming through. These lemons are particularly nice (I've made this recipe with grocery store lemons, which are nice, but nothing like fresh lemons). And no one cuts me off if I go back for more.

18 May 2010

Egg cuber


"I've known for a long, long time that something precious was missing from my life. And now I know what is {sic} was.  Cube shaped eggs."

Sous vide steak

I am excited about sous vide cooking.  The prospect of perfectly cooked meat and fish is really exciting.  The 
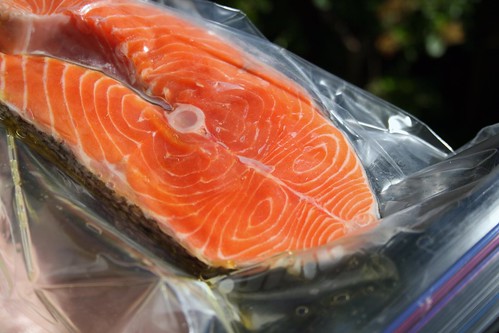
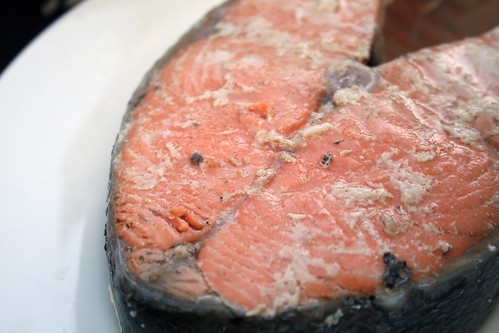
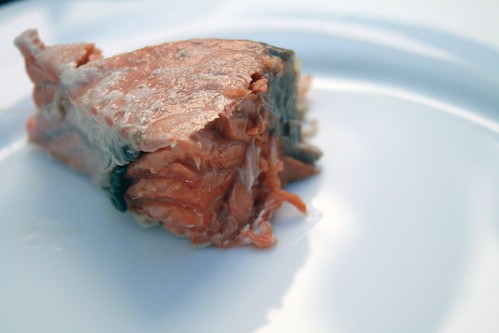
salmon that I've done sous vide was perfect (if not particularly photogenic, but that will come).  Perfectly cooked and delicious.

What is sous vide?  For a long answer, go here.  The short answer, you pack the meat in a vacuum bag, and cook it in a hot water bath kept at a very precise temperature.  In normal cooking, a steak for example, you're providing crazy heat on the outside of the steak.  The outside of the steak gets well done, the next layer gets medium-well and the inside gets cooked to medium-rare.  So basically, you're overcooking the outside of your steak to get the center perfectly done.  In a hot water bath, you can set the bath at the final temperature you want, and wait for the entire steak to reach that temperature.  Basically, you end up with a steak that is medium-rare on the surface and all the way through.  That's sous vide in a nutshell.

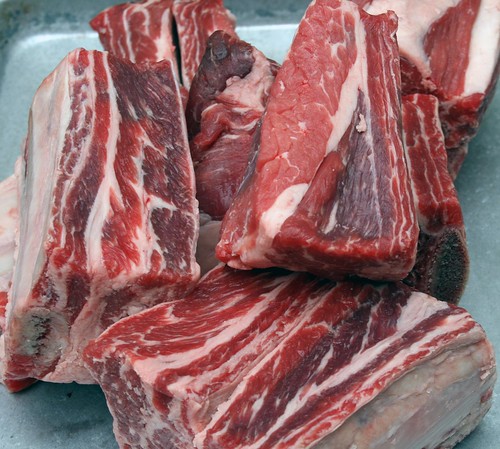
Sous vide takes all the trickiness out of steak, resulting in perfectly cooked steak.  That sounds pretty good, here at Indirect Heat, so I gave it a go this past weekend with two lovely porterhouse steaks.  I got regular steaks, not dry-aged, not marinated, so as to ensure that we were tasting the sous vide steak, and not other treatments of the meat.  I've adapted my technique from reading Under Pressure and from the eGullet sous vide thread and using a low-tech setup like the one described here.

Porterhouse steak

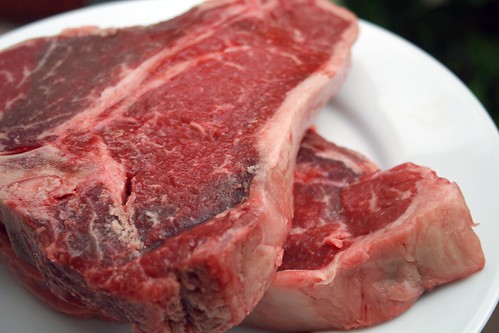
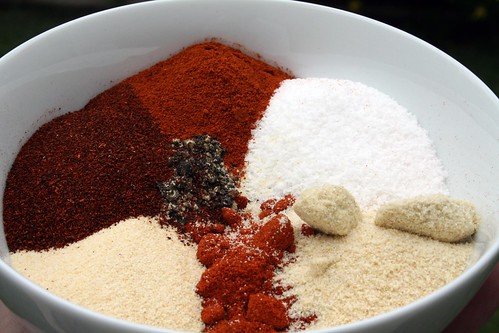
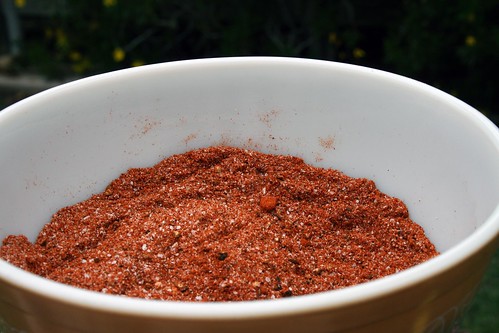
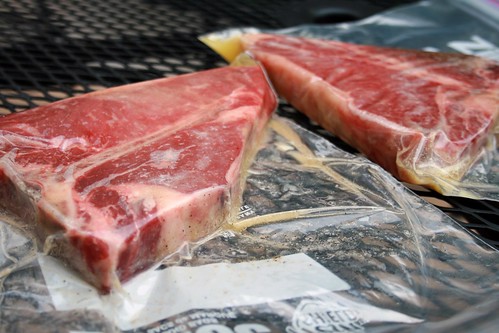
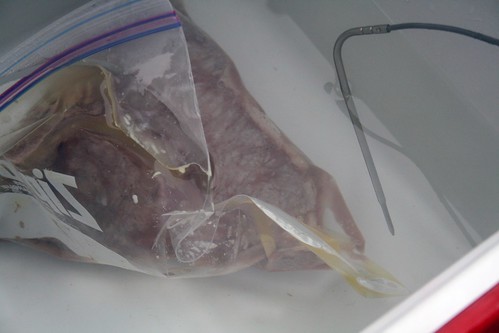
Each steak went in its own ziploc bag, with 2 tbsp of melted butter and a dash of salt and pepper (the salt may have been a mistake, more on that later).  Insert a straw into the bag, close the bag around the straw, and use the straw to suck all the air out of the bag, then seal the bag.

Sealed steak

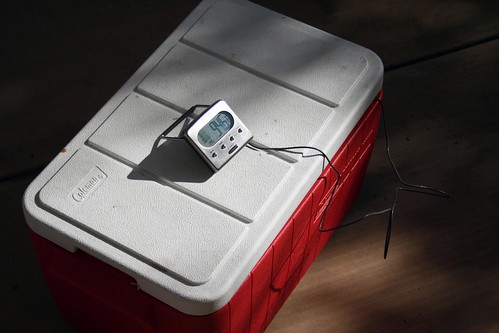
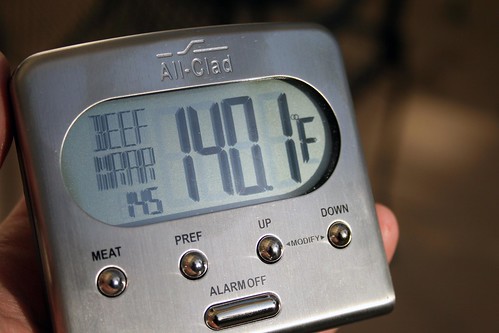
Now set up your beer cooler.  Attach the probe for a meat thermometer in the beer cooler.  Using hot water and boiling water, pour them into a beer cooler, and mix until you hit 145 °F.  Given the cook time, I let the water go anywhere between 143 and 145 °F.

Meat thermometer

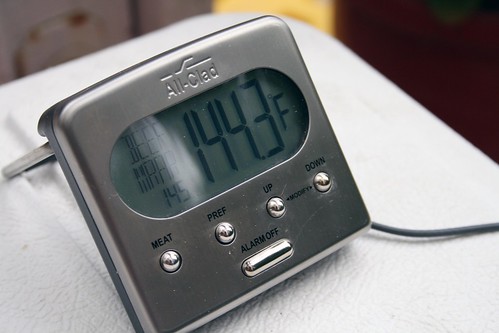
Keep a pot of water boiling to adjust the temperature when you add the steaks and as the cooler cools down.  (Over the 90 minute cook, I added boiling water 4 times).  Okay.  Now drop the steaks in the hot water, stir the water, and add a bit more boiling water (the temperature will drop in the first couple minutes after you add the steak).  Hold the temperature at 145 °F.

Sous viding meat

Now close up the cooler.  Monitor the temperature, adding boiling water to keep the temperature up as needed.  Cook the steaks for 90 minutes.

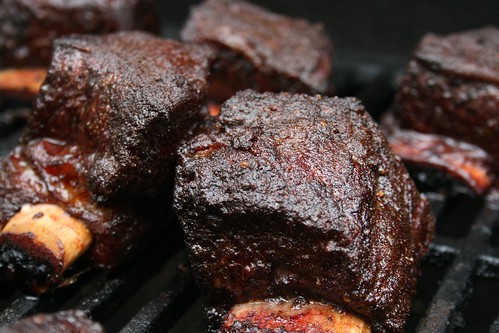
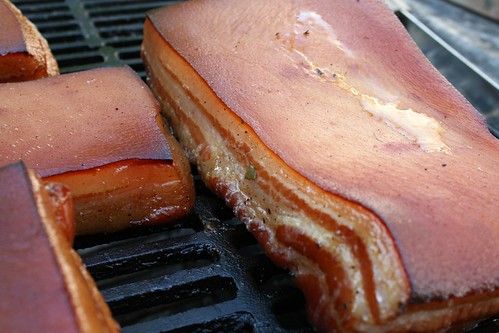
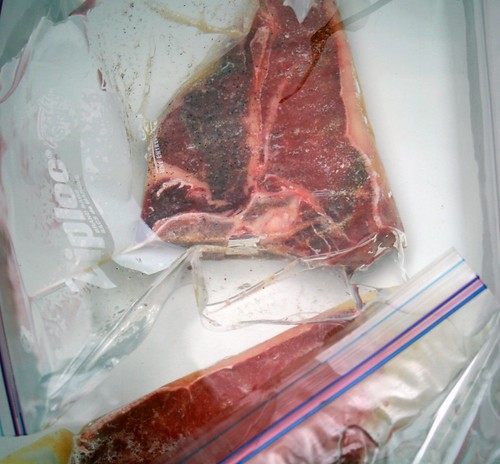
The steaks will look not that pretty at this point.  A tad grey.

Greying in the hot water bath

I pulled the steaks out at this point, then removed them from the bags.  There was a fair amount of liquid in the bag, and that's when I regretted adding salt to the bags.  I pulled those juices right out of the steak.  The steaks were extremely soft, and the tongs left a mark on them.

Sous vided steak

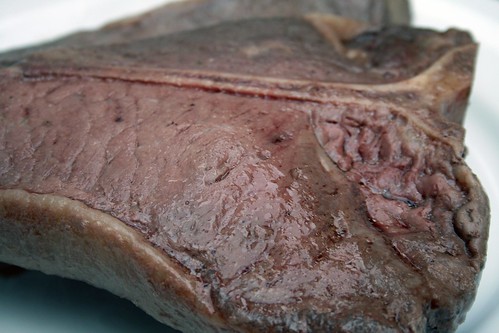
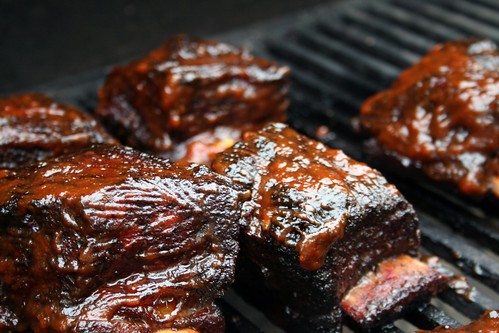
Slightly pink on the surface, but more grey.  Now, I let them cool a couple minutes.  I had gotten the grill going to sear the outsides of the steak to add a nice caramelization to the outside, but this was also a mistake.  You don't want them to be on the grill long, because you don't want to cook them, just brown the outsides.

On the grill

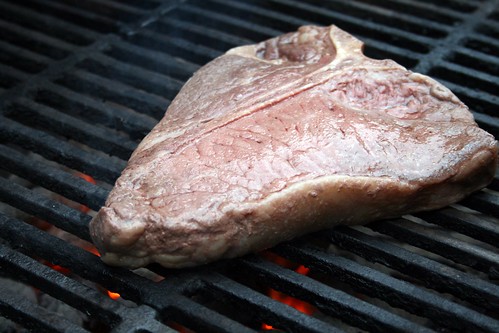
Sear briefly on each side. The grill only really caramelized the meat where the metal was.

Browning cooked steak

Pull off the grill and let rest for five minutes. Serve.

Cut sous vide steak

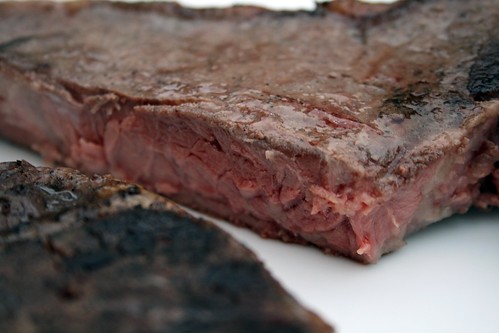
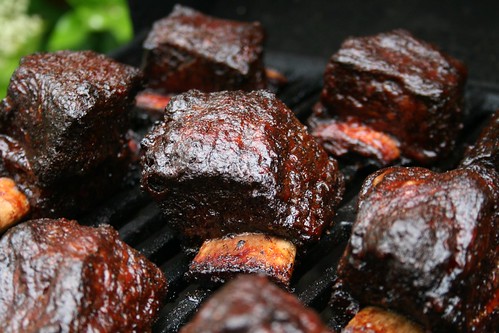
Look at that! If you can't see it properly, click through to Flickr to see the larger version. It's medium-rare all the way through. It's still pink, even though it's the texture of cooked steak. And that's the weird part of this. The texture is medium-rare all the way through.

A regular medium-rare steak is firmer on the surface, and softer on the inside. This steak was soft the whole way through. I had to be gentle moving it around to prevent myself from crushing it. It was fragile. And it was fragile in my mouth.  This was both good and bad.  It was certainly unusual, and for someone who wasn't expecting it (Mrs. Dude, for example) it was a tiny bit off-putting.  Okay, maybe more than a tiny bit (she's asked that I not make steak this way again).

It also wasn't as juicy as it could have been, and needed more salt.  But for all of these flaws, it was soft and it was delicious.  When I do it next time (when Mrs. Dude is out of town), I'll do two things differently.  No salt until it's done.  And the caramelization will either happen on a screaming hot cast-iron pan, or with a blowtorch.  This wasn't the best steak I've ever had, but I can see a path towards it being the best steak I've ever had.
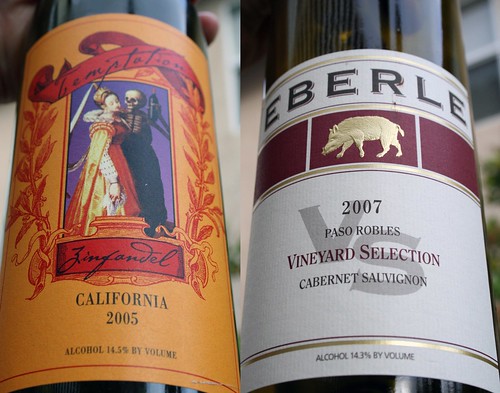
Served with:

Wine

15 May 2010

1 year of Indirect Heat

Smoked belly

Whoa.  Indirect Heat turns 1 year old today.  132 posts.  91 recipes.  And really some good fun.  A quick thanks to Dr. Ricky, who indirectly (heh, pun there. like that?) pointed me towards blogging.  I don't believe it was his intention, but there you go.  Truth is this was born out of an evening out with Mrs. Dude, in a restaurant in southern California, discussing what I could do with my cooking obsession.

Well, what has happened in the first year of Indirect Heat:

5,996 unique visitors have come to poke around Indirect Heat.  From a lot of parts of the world, shown below:

1 year of Indirect Heat

And you've voted on your favourite posts with your clicks.  Your favourite posts?  In order:
1.  Home-cured, home-smoked bacon.
2.  Roast whole pig.
3.  Home-smoked brisket.
4.  Buffalo tri-tip.
5.  Michael Ruhlman's BLT challenge (in which I earned an honorable mention).
This has been super good fun.  And it's expanded my horizons.  Feeling like I need to write a blog post has been great encouragement for me to not fall back on my old standby recipes, but to try new ones.  Thanks for spending time with me here.  Hopefully the next year is at least as fun as the past year.

13 May 2010

Sous vide salmon

I confess, I've fallen in love with the idea of sous vide cooking.

Sous vide is French for "under vacuum", the least important part of sous vide cooking.  Basically, the idea of sous vide is that you're cooking at the temperature that you want the center of the meat to arrive at, and you're allowing it to come to equilibrium.  That means that you can't really overcook your meat.  Because even after the center of the meat arrives at that temperature, it can't get any warmer, because you've immersed your meat at that temperature.  What it requires is a setup whereby you seal your meat inside a plastic bag (under vacuum, to increase heat transfer) and drop it into a circulating water bath kept at the temperature that you want your meat to reach.

Dr. Ricky recently pointed me towards a cheap sous vide setup.  I decided to take it for a spin, trying out a quick-cooking protein first.  Salmon steak.

Salmon steak

The setup:

Sous-vide setup

A ratty old beer cooler, a meat thermometer, and some hot water. Fill the beer cooler with screaming hot water from the sink. Fix the thermometer probe in the cooler, and add water that you boiled on the stove top.  Add a bit, mix, add a bit more, mix.  For salmon cooked at medium, you're aiming for:

140

or 140.0 °F.  But close enough.

Meanwhile, prep the salmon.  I warmed it up to room temperature while I was tweaking the temp of the beer cooler.  Place the salmon steak into a large ziploc bag with 1 tsp of olive oil.  Close up the bag almost all the way.  Place a straw into the bag, and use it to suck all the air out of the bag, sealing it when you're done.  This is low-tech vacuum sealing.

Straw vacuum

Not bad, all in all. Drop the fish into the pretty hot (140.0 °F) water.

Beer cooler

Submerse the salmon in the hot (140.0 °F) water, and seal up the beer cooler.

Salmon in the sous-vide

I cooked this for 45 minutes, as the steak was over an inch thick.  But I kept a pot of water boiling, and half way through the cook, when the temperature of the water bath had dropped to 138, I added a wee bit more boiling water, stirred the water a bit, and closed it up again for the rest of the cook.

Forty-five minutes in, I opened up the beer cooler, and removed the bag from the water. Remove the steak from the bag.

Sous-vide salmon

That white stuff doesn't look super-appealing, but this is one *perfectly* cooked salmon steak. Look at the near flakiness of that steak.  Perfect!  Season with salt, pepper and a wee squirt of fresh lime juice.

Sous-vide salmon

The colour makes it look a tad raw, but the mouth-feel is cooked.  This is no sushi-salmon.  The texture is of a *perfectly* cooked salmon. And really, very little effort to guarantee perfectly cooked salmon. I'm a fan of this technique.  You'll be seeing more sous vide here on Indirect Heat.

Serve with a nice wine, some home-made bread and a quick steamed vegetable.

Ahhh

Served with:

Serve with

Post-script:  For future reference, I've discovered from discussions with Dr. Ricky and reading on the internets, that the white goop on the salmon was coagulated serum albumin that you can get rid of by pre-brining the salmon in a 10% saturated salt solution.  We'll try that and get back to you...

11 May 2010

Olive oil gelato

It's ice cream season again.  I love making ice creams, sorbets and gelatos.  There are so many fun flavours to explore, and making ice cream really isn't a big deal.  It just requires a little forethought.  And an ice cream maker.  I use the KitchenAid Ice Cream Maker Attachment, simply because it's a relatively good ice cream maker that doesn't require a ton of space and isn't super expensive.

So my first ice cream of the year is an olive oil gelato from Mario Batali's most recent book, Molto Gusto, altered slightly by me:
3 ½ cups milk
1 cup heavy cream
1 ½ tsp vanilla extract
1 cup sugar
10 large egg yolks at room temperature
1 tsp salt
¼ cup extra-virgin olive oil, plus extra for drizzling
Red Gold volcanic clay sea salt (or other fun, coloured salt)
You'll want a tasty olive oil. I used this one:

Olive oil

Heat the milk, cream and ¾ cup of sugar and the 1 tsp of salt in a double boiler over medium heat until the sugar dissolves.

Cream

Meanwhile, beat the egg yolks with the remaining sugar, until light and fluffy.  Slowly add the warm milk mixture.  You want to make an emulsion, so it's important that you add the first bits of the milk mixture slowly.

egg beater

Prepare an ice bath, with a bowl large enough to hold the egg and milk mixture set inside the ice bath.

Pour the egg and milk mixture back into the double boiler, and heat over low heat, mixing constantly.  You want to mix this until a thermometer sitting in the egg and milk mix registers 185° F.  Immediately pour the mix into the bowl sitting in the ice bath.  Cool and mix for a few minutes, then add the vanilla, cover and transfer to the fridge.

Custard

Chill overnight.  Now make the gelato using your ice cream maker's instructions.  In the case of the KitchenAid attachment, I freeze the bowl for 2-3 days prior to making ice cream.  Then, while the bowl is mixing, pour in the chilled custard.  (It has to be mixing, or the custard will freeze hard, and you'll make frozen chunks of custard instead of gelato).

Gelato

Mix for 10-15 minutes, then add the olive oil.

Gelato

Mix for another 10-15 minutes.  Then transfer to a container, and freeze overnight in a freezer to cure, or harden the gelato.

Serve with a drizzling of olive oil and a sprinkling of a sea salt (preferably coloured, for presentation purposes).

Olive oil gelato

This is a fascinating gelato.  The flavour is rich and bright.  The salt is absolutely necessary (in the photo above, it may even be too lightly salted) to help cut the fat.  The olive oil and cream make this a really rich dessert.  It's tasty, but it's easy to have too much (think cheesecake).  One to two scoops at a time is a perfect serving size, so make this stuff for a large gathering, or you'll be swimming in it.  So, who's coming over for olive oil gelato?