29 December 2009

Smoked turkey

I'm not much for the "traditional" Christmas dinner. Turkey is far from my favourite bird. It's not as flavourful as goose, and certainly more dry than a duck. But I have a deal with my wife. If I make her traditional Christmas dinner, that is, turkey, cranberry sauce, salad, veggies and rhubarb pie, then I'm allowed to cook whatever I want for the rest of the holidays.

Well, what better way to heighten the flavour of a turkey, than to brine it and smoke it. I start the night before with a fresh, unaltered turkey. Three points to keep in mind before you start. First is that most turkeys have been extensively injected with salty chicken or turkey broth. While that makes the flavour stronger, it also makes them fairly salty. If you brine a pre-treated turkey, you'll create an inedible salt bomb. Secondly, don't forget if you're starting with a frozen turkey, it'll take a day per 5 pounds to thaw it in the fridge, and it needs to be thawed (or nearly thawed) when you place it in the brine. We started thawing our 10 pounder a day and a half prior to brining. Third, smoking takes longer than roasting a turkey. That said, for food safety sake, don't stuff your turkey, and don't smoke a bird bigger than 16 pounds. You'll need thirty minutes per pound, so anything bigger than that will be too long in the danger zone, and you don't want to serve your family a big poultry bag of Campylobacter. You really, really don't.

Okay, the brine:
1 ½ gallon water
1 ½ cup salt (2 ¼ cups Kosher or coarse salt - Kosher salt is flaked to make it less dense)
¾ cup sugar
½ cup dried tarragon
1 ½ tsp black pepper
Boil the water to get rid of any chlorine in it. Let cool to room temperature. Mix in the salt and sugar until they're dissolved. Add the tarragon and pepper. Place in a large container. (I reserve a bucket just for brining a turkey every year - it's carefully labeled, to ensure we don't use it to bleach the floor):

food only

Place in a sink, so that when you add the turkey to it it doesn't overflow all over the kitchen counter. Not speaking from experience, or anything. Nope. Nope. Didn't happen to me *ever*. (At least, not since the first time).

Brine

Remove the turkey neck and the bag with the guts in it, (I save the neck and heart for making gravy). Submerge the turkey in the brine, and place back in the fridge. Leave in the brine for approximately twelve hours.

The next morning, remove the turkey from the brine, briefly rinse in the sink, and pat dry.

Clean the turkey

When dry, rub the bird down with olive oil. This will crisp the skin up nicely, as there's not enough fat in turkey skin to make it nice. Truss or not. I won't discuss trussing, because my trussing skills are pretty rough (see the photos). Fire up your smoker to a toasty 225°F. Place the bird breast side up in your smoker. We're using indirect heat here. I use wet hickory for smoke (hickory that's been soaking a few hours in water) and charcoal (not briquettes - it's easier to control the heat with lump charcoal) for heat.

Turkey on the smoker

Smoke for thirty minutes per pound. Half way through, open up the smoker and and rotate the bird so the other side of the bird is facing the heat source.

This photo is at about three quarters done:

Smoked turkey

Sadly, photos taken after this point aren't beautiful (it got dark, and I had to use a flash). But look at that turkey deliciousness!

Take the bird down when a meat thermometer shows 180°F at multiple checked points (don't start checking too early, you don't want to put too many holes in this bird!). Let the bird rest 10-15 minutes before carving. Carve and serve.

These days, this is the only way I enjoy turkey. The smoke adds a reallllly great flavour, and the brine makes the bird salty and moist. Roast turkey is truly bland and boring in comparison. The other bonus point? Having the bird on the smoker leaves the oven free to make pie or bread or any number of other things. It's like having a second oven for the holidays.

Delicious!

26 December 2009

A lazy Saturday calls for...

Cloves

... Hot Christmas Punch! Every year during the Christmas season, my mother would make this warm Christmas punch. It smells up the house of cinnamon and cloves, and smelling that reminds me of every Christmas I spent with my family.

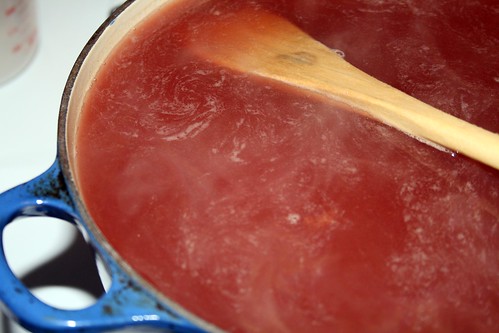
This year, we've already made this punch countless evenings, and today (on Boxing Day), I'll be making a large pot of it:
3 cups cranberry juice
3 cups pineapple juice
1½ cups water
⅓ cups brown sugar
1½ tsp whole cloves
1 cinammon stick
pinch of salt
Put the cloves in a tea ball. Combine all the ingredients in a heavy pot, warm to a simmer, then drop the heat down and keep it hot on the stove. As you might imagine, it gets better with time (though we will add some water to it at the end as it reduces to a thicker consistency).

Serve hot in mugs.

Hot Xmas punch

Happy Boxing Day.

24 December 2009

Iphone cheese?

I present this Merry Christmas food photo without comment.

22 December 2009

Last minute Christmas shopping

For the bbq lover in your life - what would they want more than art celebrating their love of pork?


Via Eatmedaily, we find the Latvian art student Liva Rutmane. Available at Etsy, for $440. Merry Christmas.

19 December 2009

A lazy Saturday calls for...

...eggnog!

Eggnog

My wife and I have been having a Christmas party as long as we've been together. The first year we had it, my graduate advisor brought an intensely flammable eggnog. It was rich and frothy, not too sweet, but filled with flavours of nutmeg and honey. She claims the only time she hears from her former students is at Christmas time when they call and ask for the recipe for this eggnog. I cleverly wrote it down that first year (so she never hears from me), and it's now a tradition around our home to serve this delightful stuff.

This is the flavour of Christmas in a cup. Delicious, rich and creamy. Indeed, I spend 11 months of the year dreaming about this eggnog. If it were traditional to drink this year-round, I'd be a much larger man with a much smaller liver. (Disclaimer: This recipe has raw eggs in it. If you're not willing to risk the relatively small risk of Salmonella, don't make it. Indeed, if you have any underlying health condition that would make Salmonella a life-or-death event, all you should do is look over these photos, and drool over the eggnog. No raw eggs for you. Be sensible.)

Alright, I generally do a 2x to 3x recipe for a Christmas party with 30 guests:
2 eggs
4 cups whole milk
2 cups heavy cream
honey to taste
1 cup dark rum
1 cup brandy
lots of fresh ground nutmeg
Separate the eggs. Beat the yolks until yellow and foamy.

Eggs

You're going to make an emulsion, so you want a nice foamy egg yolk. While mixing, slowly add the booze. If you add it too fast, you'll curdle the yolks.

Eggs

Beat in the milk. (Or in a triple batch, beat in about half of the milk - you'll have to add the rest of the milk in a separate, larger bowl).

Eggs + alcohol + milk

Once all the milk is added, add the honey to taste, mixing well to ensure that it dissolves properly. I tend to aim for a barely sweet mixture, as overly sweet eggnog is too cloying for me. But again, you're adding it to taste.

Eggnog

Beat the egg whites until they hold stiff peaks. Beat the heavy cream until they hold light peaks. Fold into the eggnog. Grate in lots of fresh, whole nutmeg (to taste). It really makes a difference, as freshly grated nutmeg is not at all bitter. Then leave the grater out for people to grate more fresh nutmeg on their drink.

Eggnog

I used to be concerned about how long you can store this stuff, and would dump it if I had leftovers more than a few days after the party. However, Michael Ruhlman claims that homemade eggnogs improve with age (up to two years), so now I'll hold onto it for as long as it takes to finish it (never more than a few weeks).

Merry Christmas and Happy Holidays to one and all. I hope you find a lazy Saturday or two over the holidays, and find your own way to enjoy it.

17 December 2009

If only I could speak German.

A new German magazine. Via EatMeDaily:

BEEF! is for men who are interested in recipes –as well as Tokyo's tuna market, the sharpness of knives and the water pressure in their espresso machine. For men who find noodles boring unless they've made them themselves... In the past, cooking magazines were for women, and men's lifestyle magazines were for men. BEEF! combines the two in a fresh, informative and entertaining manner.
If only I could speak German. *sigh*

15 December 2009

Boneless leg of lamb

I have a new favourite dressed up dinner. In America, we really don't eat enough lamb. It seems pretty fancy to serve lamb. A special occasion, even. Lamb is my new fave. Grilled boneless leg of lamb, that is (modified from Serious Barbecue, natch).

Pick up a boneless leg of lamb from your butcher. Get them to butterfly it for you (basically, they cut it in a way so that you can unroll it into one strip of meat that can be grilled quickly). It's better thinner, because you get a nicer ratio of rub/marinade to meat.

Morning of, prepare the marinade:
2 cups extra virgin olive oil
½ cup red wine vinegar
1 ½ tsp fresh chopped rosemary leaves
1 tbsp sugar
30 garlic cloves
5 medium shallots, peeled and sliced
2 tsp fresh chopped thyme leaves
Rosemary and thyme

Chop the herbs. Mix the sugar, oil and vinegar, and pour over the meat, the glorious, beautiful, meat.

Marinade

Toss the herbs, shallots and garlic on the lamb, and marinate, covered in the fridge, for 6-12 hours.

Marinade

Flip the lamb a few times during the marinatification. Garlicky delicious smell drives me nuts, I want to gnaw on that raw lamb, but don't! Not time yet.

Before dinner, pull the lamb out of the fridge, wipe off the chunks of herbs and pat down the lamb. Rub the dried off lamb all over with:
1 ½ tbsp garlic powder
½ tbsp salt
2 tbsp fresh ground black pepper
1 tsp cumin
1 tsp cayenne
Rub

Light the fire, get a decent hot grill (not screaming hot, but pretty hot). While heating up the grill, prepare the glaze:
½ cup honey
2 tbsp red wine vinegar
¼ cup coarsely chopped flat-leaf parsley

Glaze

Okay, the grilling goes fast, but here we go. Place the meat on the grill, fat side down. If the grill is too hot, you'll have an immediate flareup. Don't use a grill that's too hot. Set a heavy cast-iron pan on top of the lamb to flatten it out.

Lamb on the grill

Grill fat-side down for 15 minutes. Flip, place the cast iron pan on top of the lamb, and grill the other side for 10 minutes.

Panned lamb

Brush the glaze on, and grill 2-10 more minutes (depending on how you like it done), flipping twice during the grilling, and brushing more glaze on. Place the lamb on a cutting board that has a bit of extra-virgin olive oil and fresh lemon juice drizzled on it. Let rest 10 minutes, slice and serve.

Grilled lamb

Delish. The marinade/rub/glaze mix makes for a really delicious mixture of flavours. What a nice dinner to make, that doesn't take a ton of time to throw together.

Serve with:
wine

13 December 2009

Happy 1-year blogoversary to Dr. Ricky

Happy blogoversary to Dr. Ricky, who celebrates his 1-year anniversary of bloggage today. Dr. Ricky and I have had some good times cooking together over the years, and I enjoy reading his thoughts on restaurants, cooking and food. Whether I agree with him or not, his posts are thought-provoking and fun.

Happy 1- year blogoversary, Dr.

Chocolate tweed angel food cake

10 December 2009

Science cookies

As a microbial geneticist and a home cook, my heart was filled with cookie joy at seeing these cookies. Some of my favourite things are food and data. Not everyone is going to get this, but how funny, an electrophoresis cookie!


Head on over to Not So Humble Pie for more science cookies.

03 December 2009

Chinese pork dumplings

The first time my wife and I threw a party together, we each prepared a number of dishes. She claimed she wasn't much of a cook, I claimed I was. We were both wrong. I made a large spread of dishes, she made one dish. Her one dish was the hit of the evening. Chinese pork dumplings.

As scientists, we have the privilege of working with people from all over the world. This recipe comes from a Chinese post-doctoral fellow that we worked with in the late 1990s. It's pretty simple to make, and people *just love* it.

2 lb ground pork
1 tbsp salt
2 tsp sesame oil
4 tbsp or more soy sauce
1 head Chinese cabbage, finely chopped
8 green onions, cut finely
4 grated carrots
4 eggs
~ ½ - 1 C flour (to dry out filling)
wonton wrappers
Chop the vegetables finely.

Onions

Mix.

Veggies

Mix in the pork by hand.

Ground pork

Add the flour until thickened to the point that it's no longer runny. You just want enough to absorb the free liquid.

Pick up a wonton wrapper, and dip your finger into a dish of water. Gently run your finger around the edge of the wonton wrapper (this will be the "glue" to seal the wrapper). Scoop enough pork mix into the wrapper that it will be a tight fit to get it all in there. Free flappy dough isn't delicious, you want it to be full.

Filled dumpling

Pull one corner across the wonton to the opposite corner.

Folding dumpling

Seal the edges.

Folding dumpling

And set the dumpling aside.

Dumplings

Meanwhile, get a large pot, half full of water, boiling. Drop the dumplings into the boiling water.

Boiling dumplings

As you add the dumplings, the water will stop boiling. When it comes to a boil, add 2 cups of cold water to the pot. This will stop the boiling. Repeat this two more times so that the dumplings come to a boil three separate times. Remove the dumplings from the boiling water.

Dumplings

Now, quickly mix up a dipping sauce. Pour sesame oil on a plate. Drizzle on some soy sauce, and drop a glorp of sambal olek (Asian hot sauce) in the middle.

Dipping sauce

Dip the dumplings in this sauce.

Dumpling

Crazy delicious. Porkish. Deliciousish. Perfect.

We'll make a bunch in advance, boil twice and remove to freeze. Boil one more time to serve. That way you can make this amazing delicious thing weeks in advance, and still be able to serve yummy homemade pork dumplings while taking care of other dishes. Yum.

01 December 2009

Frisée Salad with Lardons and Poached Eggs

If I were to give a young man advice to winning the heart of the woman of his dreams, I would say, "Learn how to cook." There's nothing quite like a romantic home-made dinner to melt a girl's heart. My wife fell in love with me over this salad. And every year, I let her choose the menu for her birthday. Without fail, she chooses this salad. It's quite simple, it's basically a vinaigrette, substituting the oil with bacon grease.

However, she always prepares the lettuce. Always. See, I don't make salads. I'll make the dressing and make the additives, but I have lettuce-phobia. When I was in high-school, I worked in a pizza joint for 2 years. We served a lot of pizza, but very little salad. Nonetheless, my boss bought lettuce in bulk from the restaurant supplier. So we'd have this huge bag with 10 heads of lettuce in it and we'd serve a salad every other night. Needless to say, the bag would go bad, *every time*. You'd think he would learn. And when an order would come back for a salad, he would send me into the cold room to make a salad. I would come back and say, "All of the lettuce is rotten. There's not enough to make a salad." He would send me back. "Find a salad". It would take me pulling apart 5 heads of lettuce to find enough non-rotten lettuce to make a salad. I haven't made a salad since. My wife prepares the beautiful, pristine bowls of lettuce.

frisee

So this is a happy story.

I modified this recipe from Gourmet (in the years before it started to suck):
½ pound frisée (French curly endive)
6 ounces slab bacon or thick-cut bacon slices
2 tablespoons white wine vinegar
4 large eggs
2 tablespoons chopped shallot
3 tablespoons red-wine vinegar
fleur de sel
I use homemade bacon for this recipe. Chopped into rather coarse bacon bits. If you chop it this way, you get nice crispy outside, and soft chewy insides of the bacon bits. Perfect.

To start, get a pot of water boiling. Add the white wine vinegar to it.

bacon and shallots

Meanwhile, chop the bacon coarsely and sauté in a small frying pan.

bacon

Fry the bacon until it looks crispy and delicious.

fry that bacon

Fish out the chunks of bacon.

lardons

Toss the shallots into the hot bacon grease. Sauté the shallots in the bacon grease until softened.

shallots

Meanwhile, poach the eggs in the boiling water. I crack the eggs into a cup and lower them into the pot. Cook them until the whites have turned white, that way you still have runny egg yolks. Yum. This next part is tricky. You want to assemble all parts of the salad and serve while hot.

Dress the salad with the bacon.

frisee with bacon bits

Meanwhile, fish out the poached eggs and set them on top of the salad AND deglaze the pan with red wine vinegar.

shallots deglazed

If you're leaning too far forward when you deglaze the hot grease with the red wine vinegar, you'll feel like you've been punched in the face by the vinegar vapor. Just don't do it. Yes, that is a mistake I've made. Ow.

Pour the vinegar/bacon grease/shallot mixture over the salad.

Assembling the salad

Sprinkle on the fleur de sel. Serve. I advise guests to break the egg yolk and let it run over the salad, to make part of the dressing.

Final salad

Rich. Salty. Bacony. Outrageously delicious. And really, except the last minutes, this isn't that hard to make. Yum.